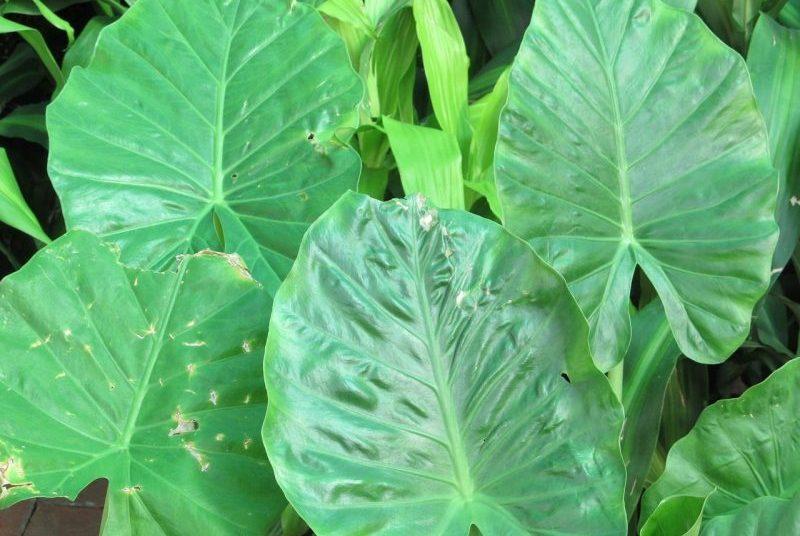
Hardiness zones 8 through 10 of the U.S. Department of Agriculture describe it as a hardy plant. The leaves of the plant, like the rest of the plant, are edible, but they must be boiled to remove the poisonous irritants before consumption.
- What Grows Best With Eggplant? Good Companion Plants For Eggplant
- How Does The Concentration Of Fertilizer Affect Plant Growth? Perfect Information For You
- How To Propagate Bleeding Hearts? Helpful Tips To Remember
- How To Propagate Catmint? Complete Guide for Beginners
- How To Grow Milkweed In Pots? Garden Guide
Transplanting Elephant Ear Plants
It’s the best time of year to transplant Elephant Ear Plants, after the last frost has passed, in the springtime. Once established, these plants are able to quickly expand and spread throughout the area. The Elephant Ear plant can be transplanted at any time of the year in locations without freezing temperatures.
Bạn đang xem: How To Transplant Elephant Ear Plants? Step-By-Step Guide

Elephant Ear transplantation is a snap when done when the plants are young. In order to successfully transplant Elephant Ear, follow these instructions:
Step 1. Pick out a spot where you’ll grow your transplanted elephant ear plants
A portion of the shadow is ideal for growing Elephant Ear. Choosing a spot near a pond where the soil is continually damp is ideal if you wish to transplant them directly to the ground. Be sure to offer some shade for them during the warmest part of the day, if you are growing them in a moist region.
Step 2. Enrich the soil
It’s also important for Elephant Ear Plants to grow in a proper soil composition. Mix some compost into your garden soil and distribute it over with a garden fork before planting. Your plant will benefit greatly from the addition of organic matter to your soil.
Step 3. Obtain the plant to be transplanted
The Elephant Ear plant can be obtained from the container or another location whenever you’re ready to transplant your plants. Removing the plant’s root ball from the container or ground is necessary. Make sure you don’t harm your tubers.
You can remove part of the leaves off the tuber before transplanting the plant, leaving only two or three leaves on top. With fewer leaves to contend with, the plant will be better able to maintain its own growth.
Step 4. Water your plants to keep them wet
Keep an eye on your transplants from time to time. Elephant Ear plants prefer moist soil, therefore keep the area moist at all times. Take care of the plant as soon as the soil begins to dry out.
Elephant ears that have recently been transplanted require regular watering. Spray the growing area with water from a garden hose with a gentle spray attachment. Stop watering after an hour if there are puddles. Push your fingers into the dirt to see how moist it is. Plants need to be watered again if the soil is damp but not saturated.
Make sure the dirt around elephant ears isn’t drying out at all. When the soil surface begins to dry, or more regularly, water elephant ears.
Start with a Better Plant
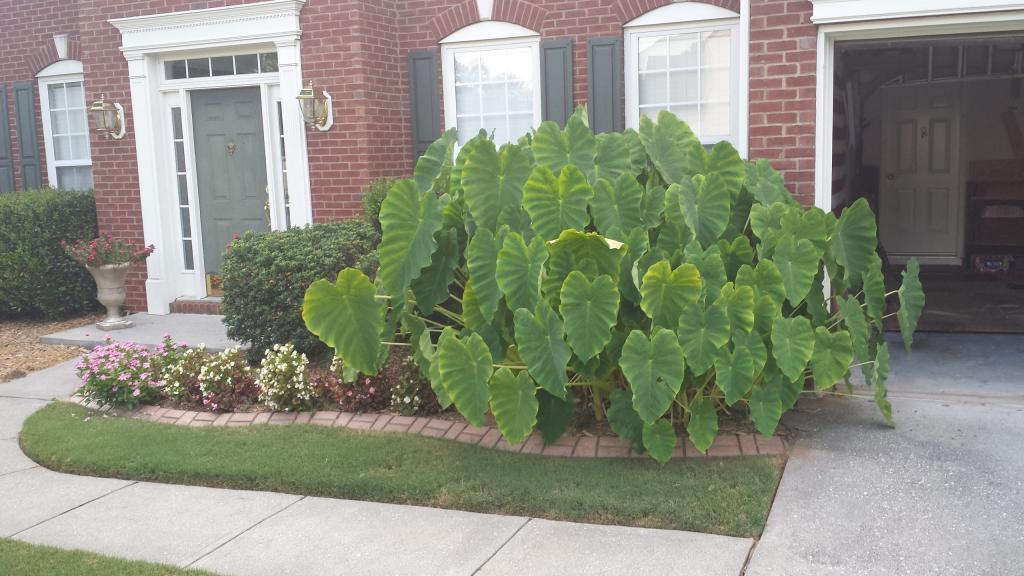
Comparing the quality of two tubers of elephant ear is easy to notice. Ear tubers are rated the same way as other bulbs. Large tubers with diameters of 9-11 inches are available from us. Strong stems and a lot of foliage make these plants grow into mighty specimens. It’s easier to grow smaller plants with less foliage from tubers that aren’t as large (like the one on the right). There are some things to keep in mind when you’re looking for an elephant ear tuber that’s in good health.
Plan for Success
Elephant ears can be grown in either full sun or partial shade. Place them in a cool, shaded area if you’re going to leave them in direct sunlight.
Tropics: Elephant ears are a plant native to the tropics Zones 9-11 are suitable for growing them year-round in the open air. Bulbs are typically grown as annuals in colder climates (zones 3-8). The USDA Hardiness Zone Map might help you determine your zone.
Spring after any risk of frost has passed is when elephant ears are planted. Planting the tubers before the soil reaches a temperature of 65oF will prevent them from growing. Early June is when this occurs in the northern hemisphere. Four to six weeks before you want to plant your elephant ears outside, you can start them indoors to get a head start on the season. The tubers can be grown in pots in a bright, warm window.
How to Plant Elephant Ears
A warm soil and no threat of frost are the best conditions for planting. 8′′ of soil should be loosened. Dig a hole about 5 inches deep.
Set the tuber in the hole with the sharp end facing up. Soil must be at least 1″ below the tuber’s surface.
Soil and water the tuber thoroughly.
Containers, Decks, and Patios. You may use elephant ears to brighten up shady porches, decks, and other areas around your home. Pools, spas, and water gardens benefit from the lush, heart-shaped leaves of these exotic plants.
Fences and Walls A wall or fence can shield elephant ears from wind and overexposure to the sun. They are also used to soften rigid lines and provide visual appeal to bare walls by putting their large leaves to good use.
Entryways Elephant ears planted in huge planters make a dramatic entrance. They create a significant impression on guests and are always a talking point. If you like, you can plant them on their own or among other plants like caladiums or coleus.
Screening It is possible to use elephant ears as a privacy screen in your garden thanks to their large leaves and tall branches. To make your yard feel more private, consider planting them along a property border or around an outdoor sitting space.
Plant for the House As long as the plants receive adequate light and water, upright elephant ears can be cultivated inside. All year long, their leaves can be a stunning sight.
Caring For Ears in the Fall
Elephant ears are exclusively winter-hardy in zones 9-11, where they can endure temperatures below freezing. Treat elephant ears as annuals and discard them at the end of their growing season, or store the tubers inside and plant them again the following year in colder areas.
Xem thêm : How To Divide A Shamrock Plant? Complete Guide for Beginners
Alocasia and colocasia tubers should be pulled out in the fall before temperatures dip below 40 degrees Fahrenheit. Start your digging approximately a foot from the plant’s center. Move the plant to a warm, dry location where it will be shielded from the winter’s cold. Once the root ball has dried, cut the stems back and remove the soil away with your hands. Allow the tuber to dry out for a longer period of time. Wrap each dried tuber individually in paper and store in a warm, dark, dry location between 50 and 60 degrees Fahrenheit.
It is possible to cultivate upright elephant ears (Alocasia) as houseplants. The soil should be continually moist, but not soggy, so that the plants can thrive.
Pro tip…
The first indication of light frost in your location means that you can get your Elephant Ears transplanted and keep them in a cardboard box filled with peat moss for the winter. Once the final frost has past, you can keep your transplants in a cool, dry location.
Growing Spot
Elephant ear transplants thrive in a secluded, somewhat shaded area with organically rich, moderately moist or wet soil. Strong winds can also damage these plants, therefore they must be shielded. Elephant ears may withstand up to eight hours of direct sunshine in a damp location, such as the bank of a pond, but the plants grow best in filtered or shaded sunlight during the hottest portion of the day.
Before planting elephant ears, add organic stuff to the soil. Add 4 inches of garden compost or aged manure to the growing area and rake it in with a garden fork until it’s at least 12 inches deep.
Planting Hole
In large planting holes, elephant ears can grow swiftly. In perfect conditions, these strong plants can reach a height of 8 feet and produce tubers weighing 1 to 2 pounds in a single growing season.
You should dig a hole that’s twice as wide as an elephant ear’s root ball and as deep. Discard the container and insert the plant into the hole. The plant’s initial growth depth should be maintained. Scoop soil into the hole with one hand while holding the elephant ears plant upright with the other. Firm the plant in the hole by gently pressing the soil around it with the flats of your hands.
Growing Elephant Ears in a Hobby Greenhouse
It’s simple to grow Elephant Ear plants. Growing them in a hobby greenhouse, on the other hand, may yield superior results (such as larger leaves and a more robust plant). Grow Elephant Ears or other plants in a hobby greenhouse and enjoy these benefits:
Advantage #1. Safeguard plants from harsh weather conditions
A hobby greenhouse’s capacity to provide adequate protection from severe winds is one of its most lauded features. You may rest assured that your plants will not be damaged or knocked over if your space is enclosed. In addition, it will shield your plants from excessive rains, which can lead to root rot.
Advantage #2. Protection against frost
As soon as the temperature drops below freezing, Elephant Ears perish. A hobby greenhouse is a safe haven for your plants throughout the winter months, providing them with the necessary warmth and humidity. Heating pads and other heat-generating items can be used to keep the greenhouse warm.
Advantage #3. Avoid damage caused by pests and diseases
Pests such as aphid necrotizer, mealybug, and mite can all attack your elephant ear plants. If not caught early enough, diseases like fungal leaf blight, for example, could endanger the plant’s life. Because your plants will be contained in a climate-controlled environment, a hobby greenhouse will help you avoid both of these scenarios.
Final Thoughts: How to Transplant Elephant Ear Plants Successfully
Your landscape will benefit greatly from the presence of elephant ear plants. Following the above instructions on how to transplant elephant ear plants will boost your chances of success, regardless of whether you’re propagating or moving your plant. In the winter, you can keep your plants alive by growing them in a greenhouse or storing them in a greenhouse.
Nguồn: https://iatsabbioneta.org
Danh mục: Garden


