Growing new plants under controlled conditions is a common part of plant research. These may be plants that have been genetically modified or plants that we require a large number of identical copies of. Tissue cultivation of small sections of the plant of interest can accomplish these goals. Plant cells that have undergone genetic alteration and are subsequently encouraged to grow into complete plants can produce these little pieces, or they can come from a single mother plant. Plant tissue culture techniques are frequently employed for both commercial and academic purposes.
A nutritional media is used to grow plant explants in a sterile environment, and the process is known as tissue culture. Plants can be stimulated to rapidly create new branches and new roots by using the right growing conditions for each explant type. At this point, the plantlets can also be separated into many smaller plants. After that, the new plants can be planted in soil and grown just like any other plant.
Bạn đang xem: How To Tissue Propagate Plants? Transfer of Plant Material to Tissue Culture Medium
There are a wide variety of plants that can be used in the classroom. To make clones (perfect genetic duplicates) of cauliflower, rose cuttings and African violet leaves and carnation stems, you can use tissue culture. Because cauliflower florets may be grown into a whole plant without the need for additional growth or root hormones, they are outstanding outcomes. Within three weeks, green shoots can be seen, and within six weeks, roots begin to form.
The most critical aspect of this task is to keep the surrounding area as sterile as possible. A single fungal or bacterial cell that comes into contact with the growth medium quickly multiplies and eventually overwhelms the small plant piece that you are trying to clone fully.
Procedure
When the growing media is not pre-poured, preparation and sterilizing are required.
Xem thêm : How To Care For Scaevola? Everything You Need to Know
Using these techniques, you can make 65 growing tubes’ worth of growth medium, or around 1 liter.
- Add 800 ml of pure water to the MS solution and stir to dissolve. Slowly, but steadily, add salt to the water. Stir in 30 grams of sugar and mix thoroughly. While stirring gently, bring the pH up to 5.8 using 1M NaOH or 1M HCl. To bring the final volume up to 1 liter, add distilled water.
- Add 8 grams of agar to the MS solution and mix thoroughly. When the agar is completely dissolved, turn the heat down to a simmer and continue to stir.
- Using 15 ml of medium per polycarbonate tube, slowly pour the warm medium into the tubes.
- sterilize the tubes for 20 minutes in a pressure cooker by placing the lids on the tubes but not securing them tightly. When it’s cold enough to handle, take out the tubes and replace the lids on the pressure cooker. Another option is to place the tubes in boiling water for 30 minutes, but be careful not to let any water get within the tubes.
Plant hormones are essential for the formation of differentiated tissues in plants other than cauliflower, thus if you plan to utilize a plant other than cauliflower, you will need to make two separate media. There should be a rooting hormone, such as NAA or a store-bought rooting hormone, in the first one, and a cytokinin, such as BAP, in the second one. To accomplish this, complete steps 2 through 4 of the recipe preparation process. Divide the mixture evenly between two pre-heated containers to keep it from solidifying. About 30 of the above-mentioned tubes can be made in each container. BAP should be added to the first container at a concentration of 2.0 mg/l. The NAA hormone should be introduced to the second container at a concentration of 0.1 mg/L. To do this, BAP (2.0 mg/ml) and NAA (1.0 mg/ml) solutions must be prepared in high concentrations. When preparing 1 liter of medium, use 100 l of the NAA concentrated stock or 1 ml of the BAP concentrated stock as a stock solution, respectively. Using rooting hormone instead of NAA is as simple as following the recommendations on the bottle before mixing it into your medium.
Preparation of a Sterile Transfer Chamber and Equipment
Using a clean glass aquarium flipped on its side, a classroom transfer chamber can be easily constructed. Make sure you use gloves and don’t inhale the fumes while cleaning the aquarium with a 30% bleach solution. Turn upside down on a clean counter or paper towels and allow to dry after rinsing with sterile distilled water. If required, use tape to strengthen the cut edges of a clean plastic sheet to allow arms to enter the chamber. Tape a clean plastic sheet to the aquarium’s open side, ensuring sure that the arm openings are at a comfortable height for the fish to reach. If you want to make it easier to keep airborne spores out of the chamber, you can put plastic sleeves over these holes. Before each use, spray with 10% chlorox bleach and dry the finished aquarium chamber with sterile paper towel.
To sterilize the forceps and scalpels, wrap them in aluminum foil, seal them with tape, and cook them for twenty minutes in a pressure cooker. To sanitize these things, you can place them in a 350°F oven for 15 minutes. It’s up to you whether you want to package each item individually or create a “kit” for each pupil.
If you prefer, you can disinfect the forceps and blades using bleach and sterile water, or by soaking them in alcohol and then putting them in a flame, although this isn’t recommended for usage in a classroom with a lot of people. Because the water can be readily polluted if proper care is not taken, it is essential to have fresh bleach and sterile water solutions on hand for each three to four pupils. Once within the sterile chamber, these liquid containers should only be opened.
Plant Preparation
To begin, you must first surface-sterilize the plant material to get rid of any bacteria or fungal spores that might be present. Our goal is to eliminate all germs while minimizing any damage to the plant material.
- Cauliflower florets should be chopped into 1 cm wide parts before cooking. If you’re using rose or other cuttings, cut them into 5- to 7-cm lengths before assembling the bouquet. You can also use the whole African violet leaves.
- For around 20 minutes, wash the prepared plant material in a detergent-water mixture. Use a gentle brush if you’re working with hairy plant material (toothbrush). Remove fungi and other organisms, and the detergent will assist moisten the material and remove air bubbles that may be caught between the hairs of a plant.
- Rinse the plant material and add it to the chlorox solution for sterilization. A minute of shaking is all that is needed, and then the mixture should be left for 10 to 20 minutes. To prevent plant tissue from spilling out, carefully pour off the bleach solution while covering the container with the lid.
Xem thêm : Ultimate Guide to Choosing a Best Flowers To Grow In Utah
The tissue is now deemed sterile. There should be no more than one sterile rinse for each procedure, as well as the use of sterile instruments and materials for each procedure. Once you’ve opened up a container, close it back up as soon as possible.
As a result, some cultures may become infected with bacteria or fungi due to students’ misunderstanding of the necessity of properly sterilizing explants. This component of the laboratory can be minimized by providing students with plant materials that have previously been sterilized by the instructor.
Transfer of Plant Material to Tissue Culture Medium
All of these actions should be performed with sterilized gloves and equipment.
- Sanitized containers of sterile water, sterilized forceps and blades, a sterile paper towel to act as a cutting surface, and enough tubes holding sterile medium should be placed in the tank to ensure proper sterilization of the plants. Before putting the containers, capped tubes, and aluminum-wrapped supplies into the chamber, they should be treated with 70% alcohol.
- Using a 70% alcohol solution, the gloves can be sprayed and the hands rubbed together to distribute the alcohol before entering the chamber. Students must not touch anything outside of the sterile chamber once they have gloves on and have been sprayed.
- Open the container containing the plant material and add enough sterile water to fill the container about half way up with the plant material. After removing the bleach, replace the cover and gently shake the container for two to three minutes. Repeat the washing process three more times after draining the water.
- Place the sterilized plant material on a paper towel or sterile petri dish after removing it from the sterile water. Cut the cauliflower into 2 to 3 mm wide pieces. If you’re using roses, cut a 10 mm piece of stem with a blossom attached. It is possible to cut the African violet leaf into 1-1.5 cm squares. Use caution when handling bleached tissues, which are clearly visible due to their pale appearance.
- Use sterile forceps to pick up a prepared piece of plant material and place it in the polycarbonate tube with the media. The flower bud should be facing up on the cauliflower pieces while they are partially submerged in the medium. The bud of the rose or other cutting should face upwards and be inserted into the medium by about 4-5 mm at the base of the cutting, in order to keep it upright. The bits of African violet leaf should be placed immediately on the medium surface.
- Reinstall the tube’s cap firmly.
Growing the Plants
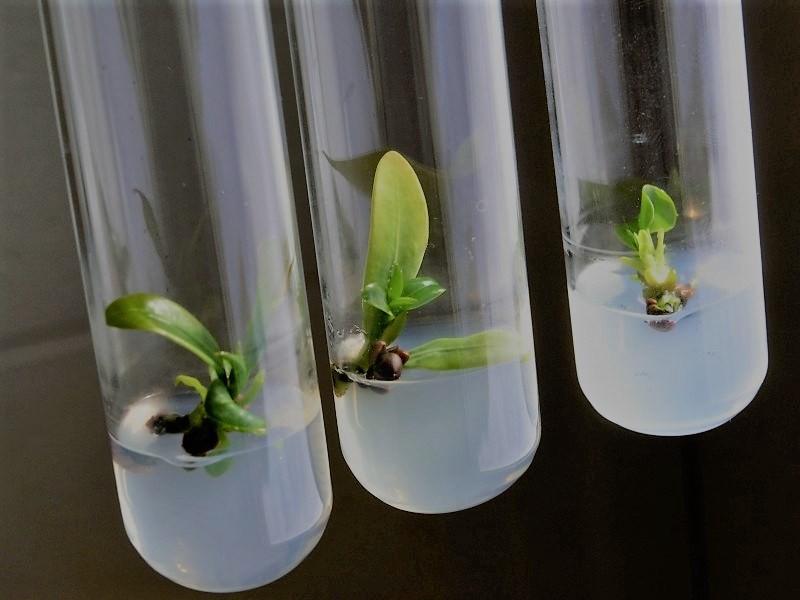
- In a well-lit area of the classroom, but not directly in the sunshine, the tubes with plant sections can be placed. If the explants are placed under fluorescent or grow-lights to offer at least 12 hours of light per day, the shoots will probably grow faster. It is possible to use the aquarium as a growth chamber by placing the lighting roughly eight to ten inches above the water surface. This will also aid in the maintenance of a more constant and comfortable body temperature.. Make sure the temperature doesn’t exceed 28°C at all times. Within two weeks, new shoots should begin to form, and they should be fully developed within three to four weeks. Every day, inspect the tubes and discard any that appear contaminated (before discarding, first sterilize in the pressure cooker or add bleach into the tube).
- Cauliflower roots can appear in as little as six weeks. To ensure that the roots of the rose, African violet, or other cuttings develop properly, they must be placed in a rooting media. The second rooting media must be introduced to the culture under the same sterile conditions as the first. All of the necessary equipment and the aquarium should be set up and sterilized as before.
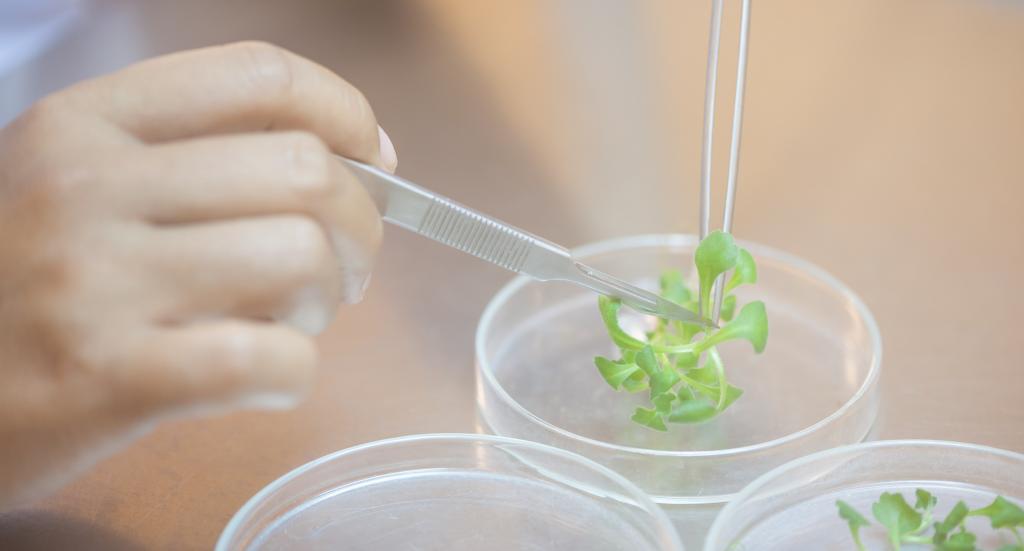
- Remove the cap from the culture tube while working in a sterile aquarium. In most cases, each explant will have produced multiple new shoots. Remove the explant with sterile forceps, and then gently pull the shoots apart with two sets of forceps to ensure that they are isolated from one other. The bottom of each shoot should be pushed into the medium to ensure good contact before being inserted into a tube of rooting medium. Within a few weeks, roots will begin to emerge from the shoots, and the cap is replaced.
Potting the Clones
The plants are ready to be transplanted into the soil after their roots are well developed.
- It is important to remove each plant from its tube of medium and put it in an individual container of light potting soil. Prior to planting, gently remove all of the agar medium. Because they are still used to the humid conditions of the tube, the plants will need to be covered as they adjust to the drier air in the classroom.
- Stack the pots on a tray and cover them with a plastic dome or tarp to keep them warm. Avoid placing the plants in direct sunlight for at least 12-16 hours of light (natural or artificial).
- After a week, remove the cover gradually to allow the plants to adjust to brighter light and drier air.
- You now have a genetically identical assortment of plants in your classroom. One common cause of variance has been eliminated, so you can use these plants in subsequent trials without fear. Some of these tests could look at how plants respond to low light levels, dryness, or saline soil.
Student Activity
- An original plant’s tissue can be multiplied innumerably through the process of tissue culture. This tiny bit of tissue is known by what name?
- For tissue cultivation, what kinds of plants might we use?
- Why do some plants need to be propagated by tissue culture rather than seed germination?
- What is meant by “sterile”?
- Tissue cultivation relies on a sterile environment for several reasons.
- In this tissue culture project, how did you or your teacher sanitize the instruments?
- What if we used the same method to sterilize plant tissue, as well? What’s the point?
- Open your plant container in an unsterile environment and see what happens?
Answers to Student Activity
- Explant
- Cauliflower, African Violet, Rose, Carnation, or almost any other plant mentioned by students can be used in this course.
Tissue culturing is employed in the following situations:
genetically reprogrammed plant cells that we need to grow into mature plants
- Bacteria, viruses, and fungi have been eradicated from the environment.
- Tissue culture medium is an excellent feeding source for a wide variety of cells. Bacteria, viruses, and fungus will outgrow the plant cells we are trying to cultivate in this environment. In a non-sterile environment, the cultures will quickly get polluted by the excessive proliferation of pollutants.
- They were sterilized in a pressure cooker or an oven after being covered in foil and sealed.
- No. We’d kill the plant if we tried to sterilize it with excessive heat.
- We can’t guarantee that the air in our culture container is completely free of bacteria, viruses, or fungi that could infect our cultured tissue explants.
Nguồn: https://iatsabbioneta.org
Danh mục: Garden


