Many folks wonder how to remove a lazy boy recliner’s seat. They’re stuck because they’re unsure of where to begin!
This guide will show you how to remove the seat from a lazy boy recliner and keep it in good working order for years to come.
Bạn đang xem: How To Remove The Seat From A Lazy Boy Recliner? Step-by-Step Tutorial
Steps on Removing Seat From a Lazy Boy Recliner
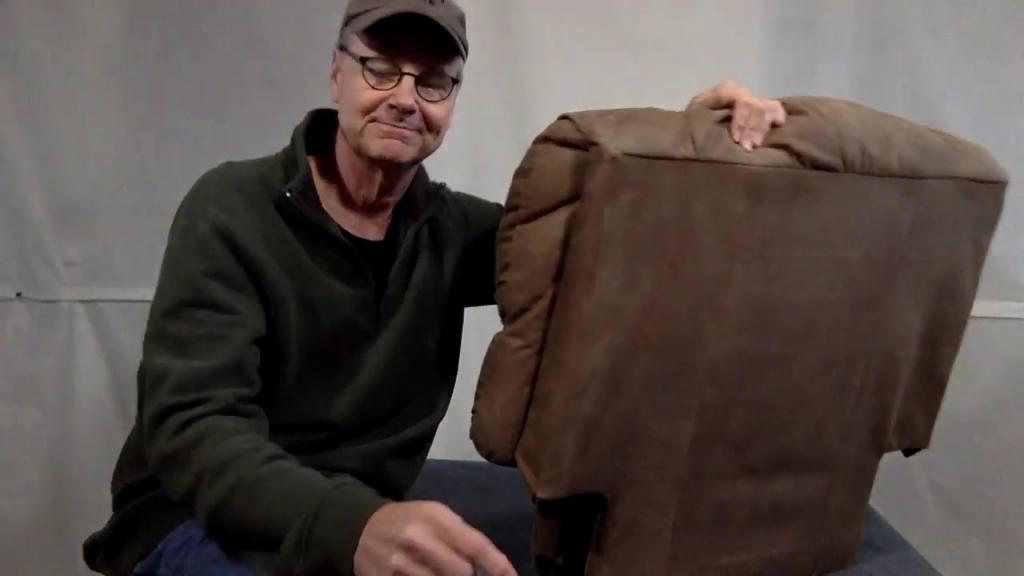
Remove the recliner’s back first. Press your thumbs into each corner on the top, pull up and then continue this process all around until you have a hole big enough to fit your hands through.. Let go of your grip a little! If you hold the rear in one hand while pressing your thumbs into the corners, the back will come off.
Step two: Lift the recliner’s armrest from the bottom and remove it altogether. You simply need to unscrew two screws each time to detach the armrests, which are attached at three spots on each side. Once the armrests have been removed, slip one hand under each one and slowly lift up.
Remove the foam cushion from the recliner in step three. It’s easier to start in one corner and work your way around by pulling on each corner of the seat (again, be gently!). If reaching into the corners is a problem for you, enlist the aid of a friend.
You’ll need a screwdriver or other flat tool to pry open the upholstery on either side of the seat and then rip out the staples one at a time until you can remove them all with your hands securely. Make sure you don’t rip anything! You should be able to lift the foam cushion out of the seat and put it back in its original packing now that the fabric has been removed.
Step Five: Get new upholstery for all of your old furniture! Working on such a large piece of furniture by yourself might be stressful, so consider enlisting the aid of a friend or family member.
As a final step, carefully staple your new upholstery to the foam cushion, being sure to use as few staples possible so that they don’t protrude from the fabric underneath (from what we can tell, this is a common problem). Staples come in multiples of one.
The final step is to hem the entire garment using your hands. Make sure you don’t rip anything! It should be possible to remove and repackage the foam seat cushion after you’ve removed the old upholstery. Staple a new upholstery over the foam cushion, using the previous upholstery as a pattern if necessary.
What is Lazy Boy Recliner?
Relaxing on a recliner is a chair or sofa. An adjustable footrest and a fully covered seat that can be rotated to sleep flat like a bed are common features of this type of chair (reclining). Removable backs are available on some versions, allowing the user to sit without the necessity of a back support.
How do I Care for my Lazy Boy Recliner?
To get the most use out of your Lazy Boy Recliner, it’s critical that you keep it clean. Here are some pointers for maintaining the pristine appearance of your recliner:
Xem thêm : What Does It Mean When Your Air Conditioner Freezes Up?
Regularly vacuum rugs, carpets, and upholstery with a soft brush attachment from a vacuum cleaner; a beater attachment is ideal.
Look for any threads of fabric that could become caught in the recliner’s mechanics while cleaning both sides of the furniture.
Never mix different cleaning chemicals and only use upholstery cleaners if necessary (do not wet them).
Before using any new product on your Lazy Boy Recliner, make a little patch test in a hidden location.
Lazy Boy Recliner Common Problems
- The creaks of the Lazy Boy Recliner
- Slide the Seat Forward.
- There is a problem with the Ottoman or Footrest.
- There is a problem with the leg mechanism of the chair.
Cleaning the Mechanisms: Your Lazy Boy Recliner’s mechanisms are susceptible to dirt, dust, food crumbs, hair, and other debris building up.
When you recline, the recliner will make a sound because of the friction between the two pieces.
Some of the components may no longer increase or descend as they formerly did.
How to Deal with a Lazy Boy Recliner
Follow these instructions to get the seat of your lazy boy chair out of the way.
Maintain the sections of your chair that are squeaking or generating a humming sound. Lifting and lowering the device will be a breeze, as will tilting it back and forth without having to worry about it “sticking.”
Using an air hose attachment on your vacuum cleaner nozzle, blow out stray hair and other dirt from inside all working parts. Before using this method to clean up anything new, always test it out in an inconspicuous location first.
Because of the amount of dirt and grime that has built up over time, you may need an area where you can accomplish this without having to worry about the mess being spread across the floor.
Replace any damaged or broken, loose wires that you find. For your convenience, I have attached a schematic showing how to accomplish this task:
How do I Remove the Seat From a Lazy Boy Recliner?
Xem thêm : How To Make An Indoor Tent For Adults? Easy Step-by-step Guide
Many people’s houses are furnished with Lazy Boy chairs. When you’re watching TV or reading a book, you can sit back and relax by raising your legs and stretching your back. When properly cared for, Lazy Boy recliners can last for decades.
THINGS YOU WILL NEED
- Screwdriver with a Phillips-head
- Screwdriver
It’s not uncommon for people to reupholster their existing reclining chair rather than buy a new one. Reupholstering a Lazy Boy recliner requires the removal of the seat. Lock brackets on the back of the unit make it easy to remove the back of the unit. When reclining, the seat is attached to the arms through bolts, allowing it can move forward and back.
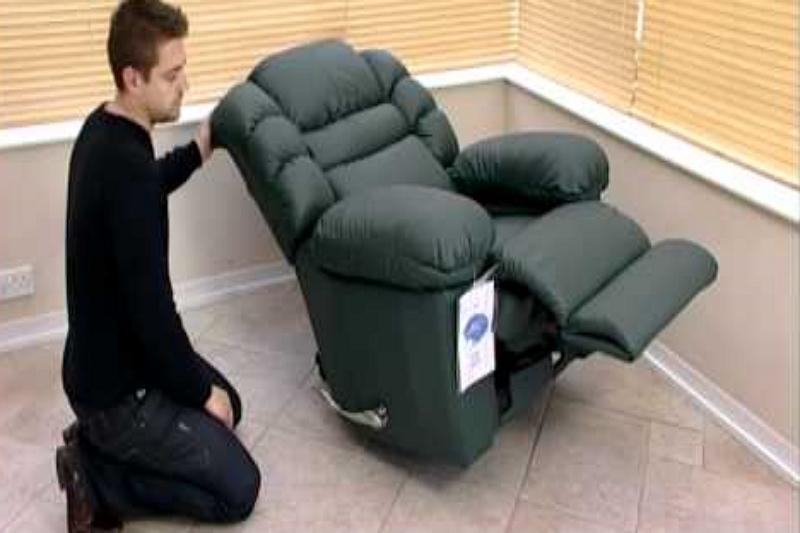
- Close the Lazy Boy recliner with the foot rest on the front of the recliner in the closed position. Lift the recliner’s front until the back rests on the floor, then lower it.
- It is necessary to locate the pin that connects the flat pivot bracket to the seat’s bottom. When the machine is in the recliner position, the bracket allows the seat to be swiveled.
- Using a Phillips-head screwdriver, unscrew a screw holding the pin in place on the bottom of the chair. Remove the pin from the flat pivot bracket by loosening it. The other side should be done in the same manner.
- Make sure the Lazy Boy recliner is in an upright position on the floor. Lift the front of the seat up above the top of the arm rests. ” Find the two bolts that hold the back of the seat to the back of the arms by looking toward the back of the seat.
- Remove the bolts from the arms by turning them counterclockwise with a socket wrench. The bolt runs through two washers on each side of the seat bracket. Keep the washers safe. Remove the seat from the Lazy Boy recliner all the way. If you need to reupholster the seat, remove the screws holding the seat brackets to the bottom of the seat.
TIP
When reinstalling the seat, place the washers on each side of the seat rear brackets.
My lazy boy chair won’t let me remove the seat when I’m reupholstering it. According to one report, there are no pins connecting the seat to the arms.
New seat springs weren’t enough to fix my La-Z-Boy. Errors in the footrest locking mechanism were causing the chair to grind against the base when it rocked.
The base was out of square with the frame due to separation at the joints. By doing so, the ratchet paddle was removed from the teeth of the ratchet mechanism. Several of the screws securing the rocker springs to the base had come loose, allowing them to fall off.
To re-glue the base, the base had to be removed. (Overnight use of Gorilla Glue works great.) Toothpicks had to be cemented into the holes in order to give enough wood for the screws to be inserted.
When I removed the back and cushion, I discovered that the mechanism in the back was much more flexible than I had previously imagined.
For a total of about $6 USD delivered, I got 18-inch replacement springs on Walmart’s website, including screws and clips (and front brackets that I did not need). It took a week to arrive. Torx T15 screws and drivers cost $0.40USD at my local hardware store.

Notes:
Remove the cushions and base with ease using the method outlined here.
- Don’t do this if you don’t have a T15. The chair’s Mst is linked to that particular fastener. These are star-shaped Torx T15 fasteners. To remove them, you’ll need a straight-blade screwdriver, but you’ll have a hard time getting them back in. Torx T15 bits are included in many multi-bit screwdriver sets.
- Remove the cushion from the back. Locking levers on the chairbacks are difficult to notice and difficult to access without a screwdriver. It is possible that an unprepared assembler or delivery person did not lock the levers properly. The lever is unlocked if you can raise one side of the back by more than a quarter of an inch. Pull the back up and rock it from side to side as the levers are nearly all the way up and into the groove.
- The front cushion retention screws can be accessed by flipping the chair over and turning the chair backwards. The screws’ heads are slightly wider than the brackets through which they travel. What you see here is a pivot. A straight rod extends from the other end of the pivot and is inserted into the chair’s side. In order to get to the screws more easily, use the footrest reclining lever. A Torx T15 driver can be used to remove the screws. The pivots can be removed by pushing them away from the chair on the other side with pliers.
- Right-side-up the chair. Seat cushions can be turned upside down by raising them up and over their backsides with a simple motion. The four rear TorX T15 screws can now be removed without strain.
- The upholstery does not need to be removed if only the flat seat cushion springs need to be replaced. One clip holds the spring onto a cross wire, and one coil spring holds the rear bracket in place, keeping each spring in place.
- Remove the rear bracket from the flat spring by unscrewing it.
- Open the clip attaching the broken spring to the cross-wire with a flat-blade screwdriver, then remove the broken spring from the wire. With the purchase of new springs, you will receive clips.
- Observe the spring’s open end as it goes through the bracket from which it emerges. To liberate the flat spring from the bracket, move it to the side opposite the open end.
- In order to remove the rocker base, the chair must be inverted.
- Disconnect the footrest release connection from the control shaft of the handle.
- Torx T15 screws on each side of the rocker spring base must be removed. Remove the middle screw first, then the rear, and finally the front screws.
- Using a pry bar or wedge, spread the spring before reinstalling the base. The front screw should be installed first. Press the back of the base down while squeezing the back of the rocker spring apart until the middle screw can be inserted loosely. Wedge the rocker spring apart until the screw can be put in the back of the rocker spring.
Nguồn: https://iatsabbioneta.org
Danh mục: Home