‘Six Hills Giant,’ a 3-foot-tall cultivar of Nepeta x ‘Six Hills Giant,’ as well as smaller cultivars like ‘Blue Dwarf,’ a Nepeta x ‘Blue Dwarf,’ are popular in gardens for their delicate blue flowers and aromatic foliage. In terms of USDA plant hardiness zones 3a to 8a, North Carolina State University’s Cooperative Extension Service recommends catmint as a low-maintenance perennial for water-conserving landscaping.
Hard pruning is required in late fall or early winter to remove the coarse and weedy looking late-season growth of catmint. If you want to keep your garden neat and pest-free over the winter months, this is an easy and fast operation.
Bạn đang xem: How To Prune Catmint? Things You Will Need
Things You Will Need
- Shears or a hedge trimmer for pruning
- Rake
- Compost
- A wire cage
- Scrubbing brush
- Disinfectant for the home
How to Deadhead Nepeta?
Catmint, an early, profuse blooming, will rebloom in the late summer if the blooms are removed after they have faded, as will other such perennials. However, because catmint is a bushy plant that produces an abundance of smaller blossoms, deadheading individual flowers is impractical. Plant and soil scientists at the University of Vermont advise against cutting off individual flowers in favor of shearing back the entire plant. Catmint should be deadheaded or sheared in midsummer, when the blooms have faded but the plant has not yet set seed.
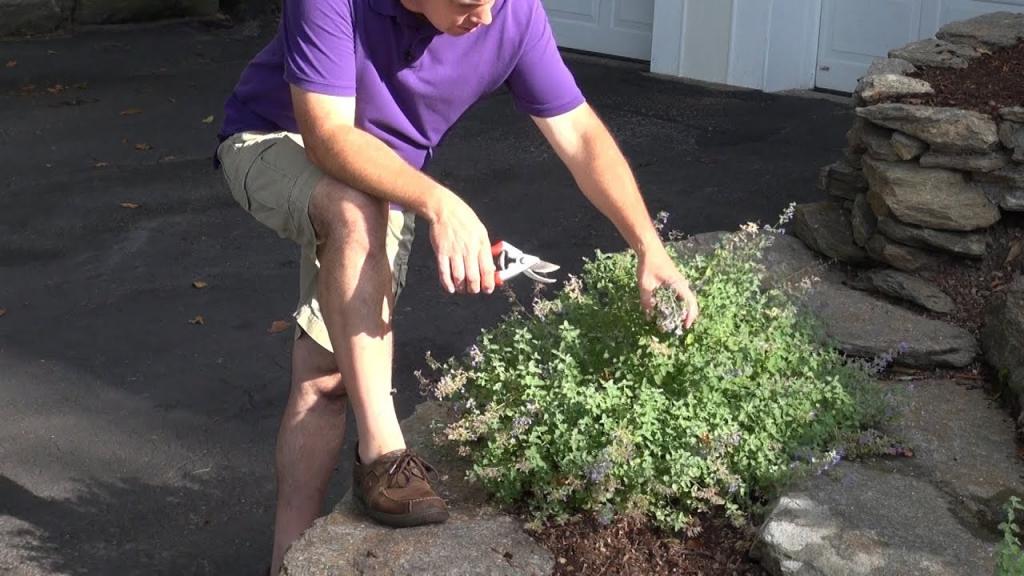
Hedge trimmers or pruning shears are recommended by the University of Illinois College of Agricultural, Consumer, and Environmental Sciences for shearing the entire plant by two-thirds to one-half. When it comes to cutting back catmint, don’t be afraid to get your hands dirty. Nepeta flower stalks and foliage should be hacked straight through and then brush away the fallen leaves and stems. After removing deadheads from the plants, be sure to re-water them thoroughly.
Cutting Back Nepeta in Fall
The University of Vermont Department of Plant and Soil Science recommends removing catmint from the garden in the fall. Catmint’s ragged and weedy appearance at the end of the growing season provides a habitat for pests, which can re-emerge in the spring and feast on surrounding plants. No need to leave any seed heads in situ for birds, as catmint seeds are of little use to them. According to Oklahoma State University, you shouldn’t cut back your plants until they’ve gone dormant, which usually happens after the first few harsh frosts of October.
Pruning shears or hedge trimmers can be used to remove the entire plant to the ground level. To keep pests and rodents at bay, rake up the dead foliage and stems. A 2-inch space between the mulch and the plant’s base is necessary to allow moisture from the soil to drain during the winter months, therefore spread a 2-inch layer of mulch around your plants.
Your garden will benefit from the cooling effect of catmints (Nepeta spp.) with its scalloped silvery green leaves and stalks of little lavender-blue, pink or white flower stalks. They come in all shapes and sizes, from little 8-inch plants to towering 4-foot specimens. According to the USDA, catmints may grow in USDA plant hardiness zones 3 through 10. When the catmints stop blooming and get floppy in the middle of summer, cut them down to encourage them to blossom again.
Step 1
Look for white spores and malformed shoot tips or blossoms on plants before pruning or cutting. If you see any evidence of the fungus on your pruning shears, you can disinfect them between cuts by soaking the blades in a solution of 1 part bleach to 9 parts water.
Step 2
Xem thêm : How To Heat A Hobby Greenhouse For Free? A Few Tips to Remember
In midsummer, when the plant has stopped blooming and been recently hydrated, snip off the top half to two thirds of the catmint stems with pruning shears. After the plants have finished blooming for the second time in late summer or early fall, leave the faded flowering shoots on the plants. It’s quite fine to leave winter-damaged foliage in situ until the following spring.
Step 3
Pruning catmint in early spring will remove all of the winter-killed growth, allowing you to clip dead shoots back to the ground, as well as green shoots just below brown tips. To make place for future growth, remove the previous year’s shoots from higher USDA zones. In these zones, the plants may not die back.
Cleaning Your Pruning Shears
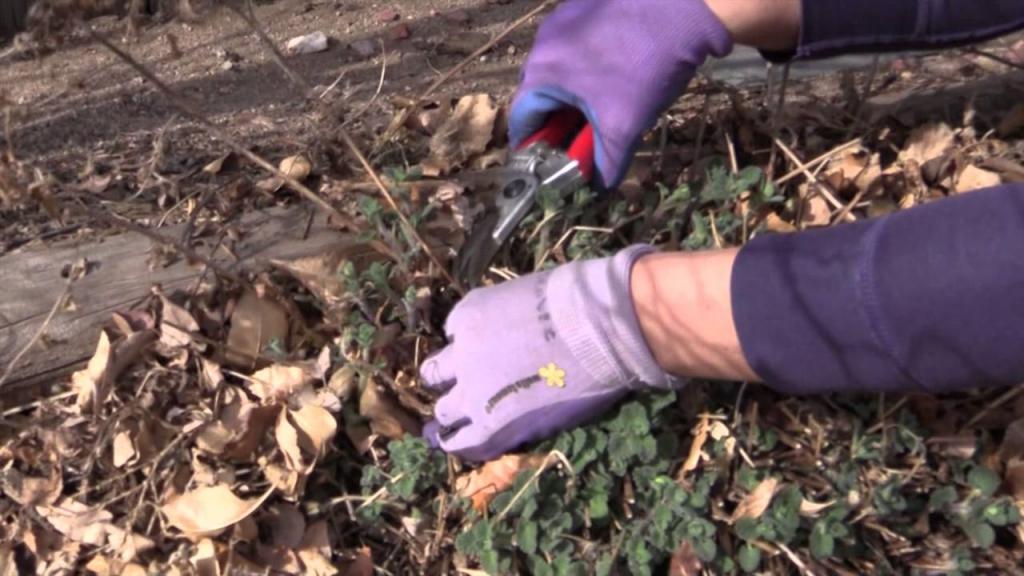
Maintaining your tools is one of the most ignored components of gardening. Especially if they are used often or on unhealthy plants, pruning shears should be regularly serviced. When using shears, it is important to use ones that are sharp and free of nicks, pits, and corrosion, which can allow viruses to enter the plant and infect it. Plants may be kept healthy by sharpening or replacing cheap shears each year and keeping them clean and sterilized.
Before sanitizing the blades, University of Florida IFAS Gardening Solutions advises washing them to remove any dirt or plant debris. Before using a sanitizing solution, wash the blades in hot, soapy water and dry them thoroughly. Because bleach can rust metal blades, full-strength home disinfectant is recommended for sterilizing pruning shears, as it kills common bacteria without corroding the blades. Rinse and dry the blades after they have been soaked in the solution for at least five minutes.
Winter Catmint Pruning
Pruning catmint in the fall or winter has numerous advantages. Maintaining a neat and tidy garden bed will prevent catmint from spreading to other plants, prevent pests from overwintering and allow for new growth to begin in the spring. Ideally, you should wait until the plant has gone totally dormant, which normally occurs after several strong frosts have been applied. Catmint is an exception, as many perennials supply food for wildlife in the form of seedpods. There are no birds that need the seeds, hence the University of Vermont’s Plant and Soil Science Department recommends that the entire plant should be hacked down hard.
Cut back perennials like catmint to 2 to 4 inches in height throughout the winter months, according to the University of Maryland Cooperative Extension Service. Pruning shears or hedge trimmers can be used to cut directly through the entire plant. In order to prune away the stems of catmint, there is no need to be delicate. Instead of composting, dispose of all dead stems and seed pods in a green trash bin. Remove and dispose of all of the fallen leaves and seed pods that have accumulated around the plants.
How to Cut Back Catmint
The blue, purple, or pink flowers of catmint (Nepeta spp.) bloom for weeks at a time even in the hottest months of the year. Depending on the species and type, these mint-family perennials can grow up to six feet tall. Catnip, a form of catmint, is well-known for its ability to entice hungry cats.
Just like honeybees, cats love catmint and it’s easy to grow, although it can become ragged and floppy in the middle of summer if not clipped. During the winter, catmint likewise goes into hibernation and leaves behind an unsightly mound of prickly, brown stems. Your catmint is best pruned in the summer after the initial bloom has faded or in early spring when it’s beginning to grow.
Cutting Back Catmint in Summer
Xem thêm : How To Organize A Small Greenhouse? Tips for Organizing a Greenhouse
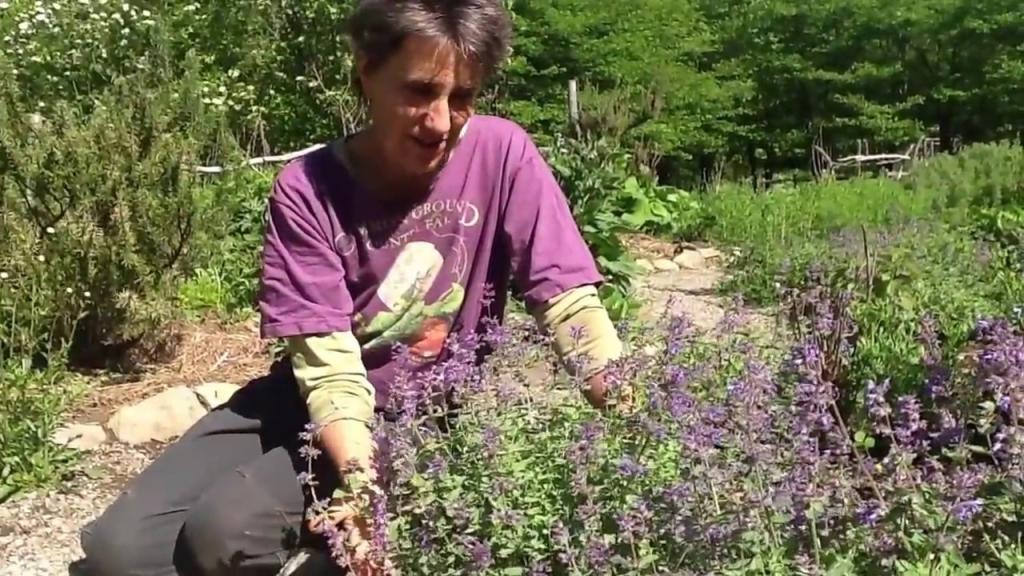
Catmint plants can bloom from late spring to early October in the garden, depending on the species. After the initial bloom, taller plants may fall over and become untidy in appearance. For a second flush of blooms, shear your plant at this time. You can trim as much as half the plant’s height with a pair of sterilized pruning shears if necessary. They’ll come back stronger than ever.
Make sure you aren’t causing the conditions that led to your plant’s failure. At least six hours of direct sunlight are required for catmint to thrive. Your catmint may be struggling because of overwatering, overly rich soil, excessive fertilization, or too much shade.
Deadheading Catmint in Fall
Catmint is known for its abundance of flowers, but you may not be as enamored with how quickly it seeds and spreads. Deadhead the blossoms in the fall before the seed has fully matured and turned dry and brown to prevent unwanted seedlings. Instead of composting the spent flowers and seeds, remove them and toss them in the trash. Alternatively, you can keep the seeds and plant them somewhere.
There is no need to deadhead varieties of N.x faassenii, such as “Walker’s Low,” “Blue Wonder,” and “Cat Meow,” of this genus. To keep the plants tidy, you can remove the dead heads from N. × faassenii hybrids.
Pruning Catmint After the Growing Season
Catmint should not be pruned again until the old season’s growth is entirely dormant, usually after multiple frosts in late winter or early spring, because you don’t want to stimulate new growth in winter. Using a pair of shears, clip back dead shoots to approximately 2 or 3 inches above any green growth that has reemerged from the mound. When the old growth is finally covered by new healthy stems, a new cloud of blossoms will appear.
Caring for Catmint
With its ability to thrive in a variety of environments and low maintenance requirements, catmint is a popular perennial choice for home gardeners. During the summer, it’s best to water your plants once a week; in the fall, watering should be reduced so that the plants are ready for winter. In autumn or spring, rather than applying fertilizer to the plants, the National Gardening Association suggests putting a layer of compost around them to supply nutrients. Compost should be applied in a 2-inch layer and should not come into contact with the stem base, since this can lead to rot.
Catmint can be bothered by curious felines who are lured to its aroma. Cats can ruin the plant’s look by rolling on it or eating the leaves. Protecting the plant but still enabling it to reach its maximum height is possible with the use of a solid wire cage placed over it. In addition, a wire cage will help keep the catmint from tipping over as it ages, which can be a problem.
Tip
Pruning plants should always be done with clean, sharp pruning shears. Pruning shear blades should be treated with a sanitizing solution to destroy any germs or viruses, according to the University of Florida IFAS Extension. In contrast to bleach, which can corrode and damage metal blades, household disinfectant cleaner is an excellent choice because it kills the majority of common bacteria without causing corrosion or damage.
Nguồn: https://iatsabbioneta.org
Danh mục: Garden


