Those of you who are interested in learning how to grow croton are likely fans of vibrantly hued leaves, such as those that are plum-hued, orange-red, yellow-green, and so on. Any room can benefit from a touch of croton or Codiaeum variegatum.
- How To Get Hibiscus Seeds? Step-by-Step Tutorial
- What Is The Temperature For Growing Lettuce From Seed In The Greenhouse? Helpful Information!
- Ultimate Guide to Choosing a Best Plants For Northern Nevada
- How Much Does It Cost To Get A Greenhouse For Planting Vegetables And Fruits In Winter In The USA?
- How To Collect Coleus Seeds? Step-By-Step Guide
This lovely plant is grown indoors in most climes. It is, nevertheless, possible to grow croton outside in locations where the weather isn’t affected by frosts. As far as you need to know about croton, the process of air layering or air layering is a must.
Bạn đang xem: How To Propagate Croton? 6 Croton Plants Care Tips
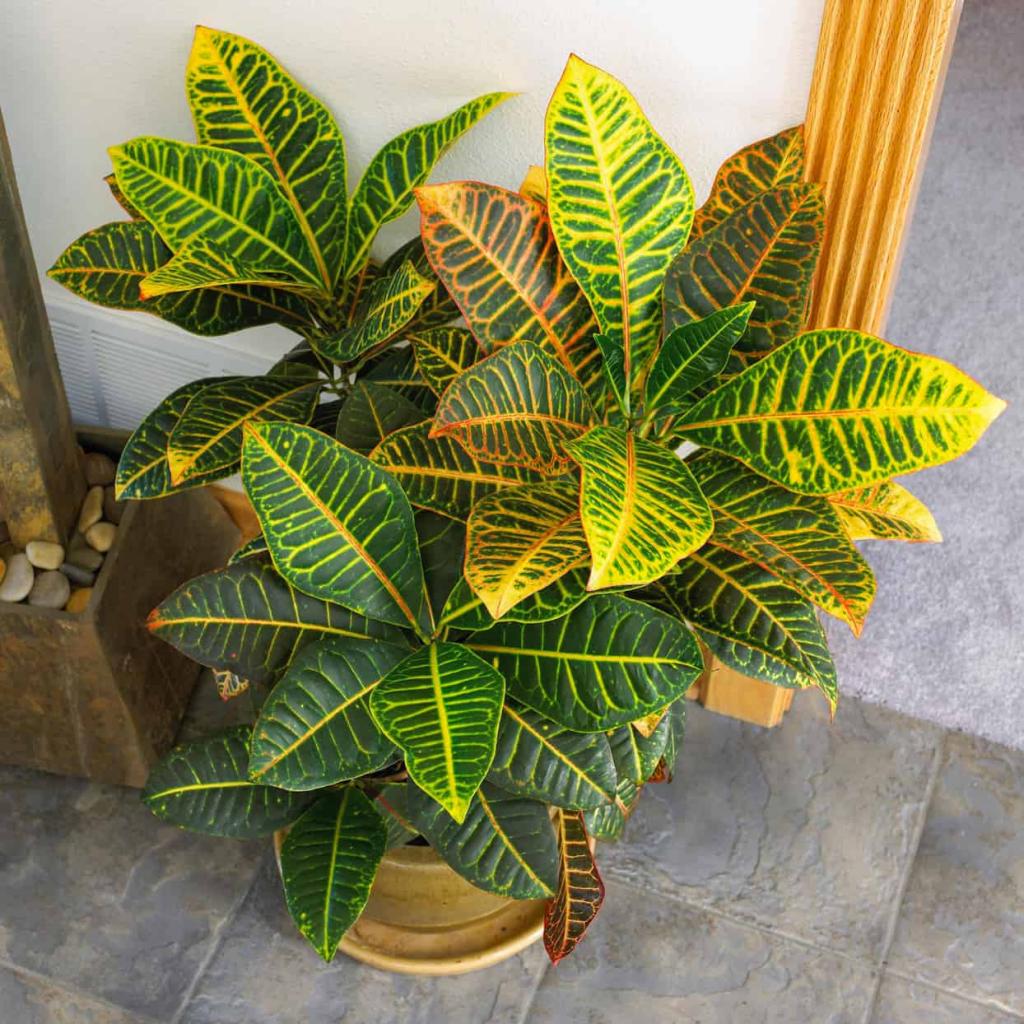
What Is a Croton Plant?
Garden croton (Codiaeum variegatum) and variegated laurel (Codiaeum variegatum) are tropical plants with enormous, patterned, and colored leaves. Indonesia, Malaysia, and sections of Australia and certain western Pacific Islands are home to the shrub known as garden croton. Plants from the genus Croton are often grown as houseplants outside of these geographical locations.
Note that there are hundreds of species of shrubs and trees in the Croton genus, which is also known as Croton.
5 Croton Plant Cultivars
Croton cultivars come in hundreds of varieties, each with a unique set of cultivation requirements. Some of the more common croton species are as follows:
- A variety of hues can be seen in the croton petra leaves, which are pointy and oblong. This particular kind has the potential to reach a height of five feet.
- In compared to many other croton cultivars, Zanzibar crotons have thin, narrow leaves. It can reach a height of three to four feet and has colorful foliage that can range from purple to yellow to green to red.
- Oakleaf croton: Oakleaf croton is an evergreen shrub with red, yellow, and green leaves with male and female flowers.
- Plant known as the “sunspot croton” because of its golden yellow spots on its leafy stems and foliage (resembling gold dust).
- Purple, green, red, and orange shades adorn the long, thin leaves of the mammy croton, which can reach a height of six feet.
How to Grow Croton Plants
The best way to develop croton plants is through division rather than seed. When temperatures fall below 40–50 degrees Fahrenheit, your crotons are unlikely to thrive because they are frost fragile and can only be grown outdoors in USDA hardiness zones 9 and above (however, you can start your crotons as indoor plants and eventually move them outside when the temperatures are ideal). Croton seedlings can be propagated in this way:
- Avoid injury by donning gloves. The milky sap from croton stems can be dangerous, so always wear gloves when handling them.
- You’ll need to get your stem cut. Cuttings from healthy plants with at least three to five leaves are required for propagation of your croton.
- Rooting hormones can help you get started. Place the cut end of your stem in a container with drainage holes and dip it into a rooting hormone.
- Take a sip of water and wait patiently. Place the plant in a bright, sunny location and water the soil until it is equally moistened. Rooting can be encouraged by placing a plastic bag over the cutting to replicate the croton’s natural, humid environment. You can either let the plant grow in its current container or transplant it to a larger one, depending on the species you’re planting and the size of your plant container.
6 Croton Plants Care Tips
Croton plants may thrive in any area, as long as they are in the right conditions. Keep your Croton in peak condition by following these simple care instructions.
- Keep an eye on them for any signs of pests or diseases. Croton plants are largely resistant to most pests and diseases, however they are vulnerable to spider mites, mealybugs, and some types of fungi. Insecticidal soap or a cotton swab soaked in rubbing alcohol can be used to eliminate infestations.
- Make sure the plant is well protected by covering it with mulch or potting soil. Croton plants benefit from a layer of organic debris placed two inches from the stem to maintain moisture and suppress weeds. To keep your plants warm in cold drafts, use a burlap sack to cover them.
- Provide them with filtered light. At least four to six hours of indirect sunshine should be provided for your crotons on a daily basis. However, the cultivar may necessitate some shade throughout its development.
- Give them plenty of water. Water your crotons thoroughly when the top half-inch of soil is dry. You may notice some leaf drop when the plants aren’t properly hydrated, so try misting the leaves with room temperature water about twice a week. Additionally, a humidifier can be used to maintain a comfortable level of humidity in the room.
- Clean up any spills. A moist cloth can be used to wipe the leaves of the Croton a few times a week.
- Fertilize. Use a low nitrogen fertilizer on your crotons twice a year, once in the spring and once in the summer (too much nitrogen will promote green growth but inhibit their vibrant colors).
Are Croton Plants Toxic?
The croton plant, in its entirety, is extremely poisonous and should never be eaten or handled in any way. The sap from the stems, which is milky and latex-like, can irritate the skin and be deadly to both people and animals in excessive doses.
A Few Basic Facts About Crotons
Croton plants need a moist, well-drained soil that is rich in humus because they are native to the tropics. In addition, these plants require additional moisture in the winter, therefore placing them on pebble trays is the ideal option. It is possible for them to adapt to decreased humidity levels even though their development rate slows down in the winter.
Xem thêm : Which Way Should A Hobby Size Greenhouse Face? Helpful Information!
If you want these plants to keep their vibrant hues year-round, make sure they have plenty of direct light. To avoid bleaching the hues of your croton leaves, avoid exposing them to direct sunshine. During the winter, consider placing them near a south-facing picture window or in a somewhat shaded outdoor location.
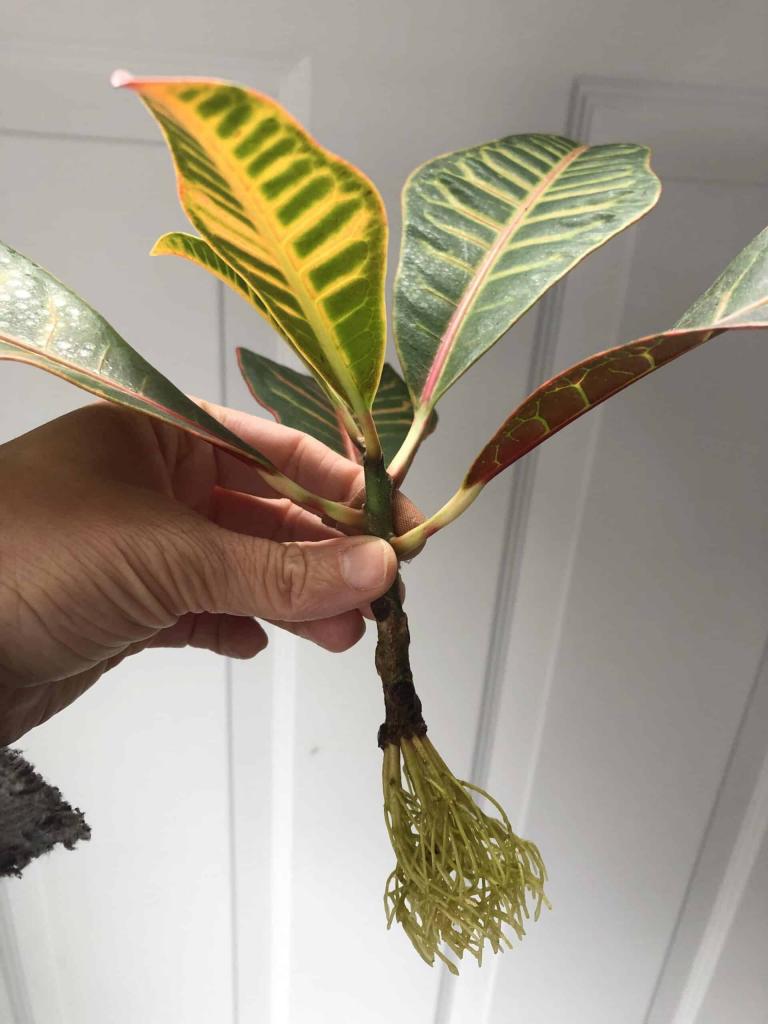
How to Multiply Crotons Through Stem Cutting
Croton plants can reach a height of 12 feet and a width of 6 feet if they are given the correct growing circumstances. Croton seedlings can be multiplied by cutting the stems.
Step #1: Do the cutting below a growth nodule
You’ll need to remove about 4 to 6 inches from the tips to accomplish this. However, you must locate a nodule of growth and make the cut below it. Leave about three to five top leaves before removing the stems.
Step #2: Dry out the sap
To remove the sap, place the cutting on newspaper and allow it to air dry. Powdered charcoal can also be used to tap the cutting.
Step #3: Plant it in the right kind of soil
Your cutting should be planted in a mixture of perlite and peat moss or river sand, which is essential. What is peat moss? It is an organic matter that has been partially degraded and extracted from acidic wetland areas, such as peat swamps. However, perlite is a volcanic element that is combined with soil to improve aeration, avoid compaction, and alter the structure of the soil.
Step #4: Tie a plastic bag around the pot
Wrap a thick plastic bag around your container or pot to keep your cutting warm and wet after it’s been planted. Temperatures above 70 degrees Fahrenheit might anticipate a cutting to root within a month.
How to Grow Crotons Through Air Layering
Using a branch that receives indirect sunlight is the key to this method. It’s important to keep in mind that the stem must be rooted while attached to the plant. Croton propagation using air layering may be found here.
Step #1: Cut a limb diagonally and hold it open
Once more, a diagonal cut through the limb below a growth node is required. Cut diagonally through the stem up to around one-half of its diameter, and you’re done! Cuts are kept open by inserting toothpicks sideways into them.
Step #2: Apply some rooting hormone powder
Apply rooting hormone powder to the cut on the stem with a tiny brush.
Step #3: Use sphagnum moss to cover the cut
The cut area must be kept moist with sphagnum moss once the rooting hormone has been administered to prevent the roots from drying out. It is possible to keep the wound moist by wrapping it with polythene and taping it shut.
Step #4: Cut the stems when roots begin to show
Before you begin to remove the plastic, you must cut the branch below the layering to remove the roots from the surface.
Step #5: Place your newly rooted branch in peaty loam
Xem thêm : How To Get Rid Of Spider Mites On Drying Weed? Signs Of Spider Mites On Weed
Peaty loam can be used to plant your newly sprung branch after cutting. If your cuttings are kept warm, you should expect them to root in about a month.
Can You Grow Crotons in a Hobby Greenhouse?
Beautiful crotons and other tropical plants do well in a small, home greenhouse. As long as you’re able to control the humidity and temperature within the enclosure, your plants will be able to experience year-round tropical weather!
Greens lovers who reside in colder climates would appreciate this alternative. Consider creating a private tropical haven in your home where you can relax, rest, and revitalize no matter what the weather is like outside!
Plants in a hobby greenhouse are shielded from seasonal pests and dangerous animals that could harm your delicate plants, in addition to the harsh weather conditions.
Learn How to Propagate Croton in a Hobby Greenhouse!
Try propagating croton in your very own hobby greenhouse now that you know how! Learn the benefits of building your own own hobby greenhouse.
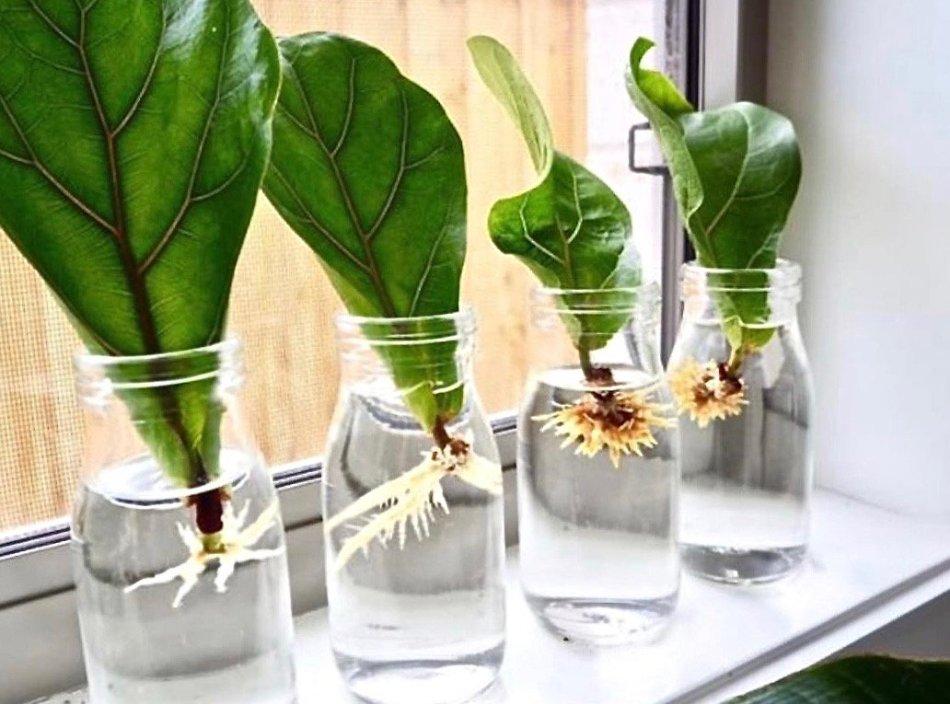
Propagation from Leaves: Stem Cuttings
Croton and many other houseplants can be propagated by rooting a stem from a healthy, mature plant. Cutting a stem with at least three sets of leaves is required for rooting. Pick a 3 to 4 inch stem. Taking off the bottom set of leaves results in the formation of new roots at the wound site. To start a croton from a leaf, just plant the stem in a container filled with potting soil. To generate a greenhouse effect, wrap the container in plastic wrap.
Air Layering
When a stem is rooted while still attached to the plant, it’s known as air layering. A diagonal cut is made through one-third to one-half of the stem’s diameter. Rooting hormone is used to treat the wound, and a toothpick or matchstick is used to keep it open. Moss and plastic wrap are used to cover the area with damp sphagnum moss. Lightweight potting soil or peat-moss-based mixtures are used to sow the stems after they have sprouted roots.
Propagation Tips
Croton watering the day before propagation aids root development and reduces plant stress. Keep the rooting media slightly moist at all times to get the best results. It is common for stem cuttings to remain moist for several weeks in a plastic container. Potting soil, on the other hand, is checked twice or three times per week, and misted when it begins to feel dry. Once it has dried, Sphagnum Moss turns a tan tint for stems propagated via layering. Plastic is removed and then reinstalled after the moss has been sprayed in this situation. Both methods of propagation require indirect sunshine because direct sunlight might scorch the plant.
When the croton root system is fully established and fresh plant development is visible, a propagated plant is ready for transplantation.
General Care
However, partial or filtered shade is best for Croton in the midday heat. Croton leaves that are exposed to too much sunshine lose their vibrant colors. For 30 minutes, allow the pot to drain freely before re-watering croton to the point where water trickles out of the drainage hole. A monthly fertilization regimen is best for Croton because it is a low-feeder. Use half the recommended solution strength of a liquid houseplant fertilizer.
Temperatures of 70 degrees Fahrenheit during the day and 10 to 15 degrees cooler at night are ideal for croton. Croton is susceptible to frost damage, so keep it out of drafts to prevent it from going to seed. After watering, it wilts a bit, but then springs back to life.
Nguồn: https://iatsabbioneta.org
Danh mục: Garden


