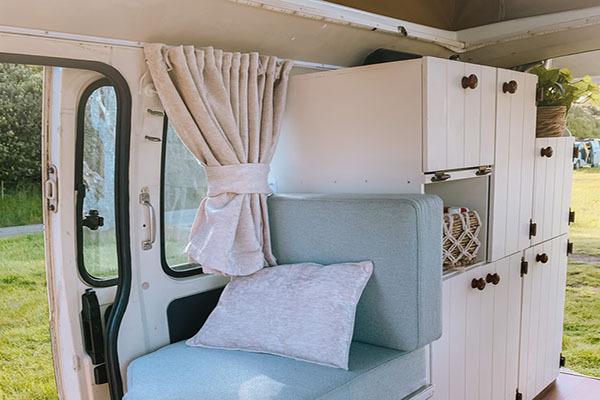
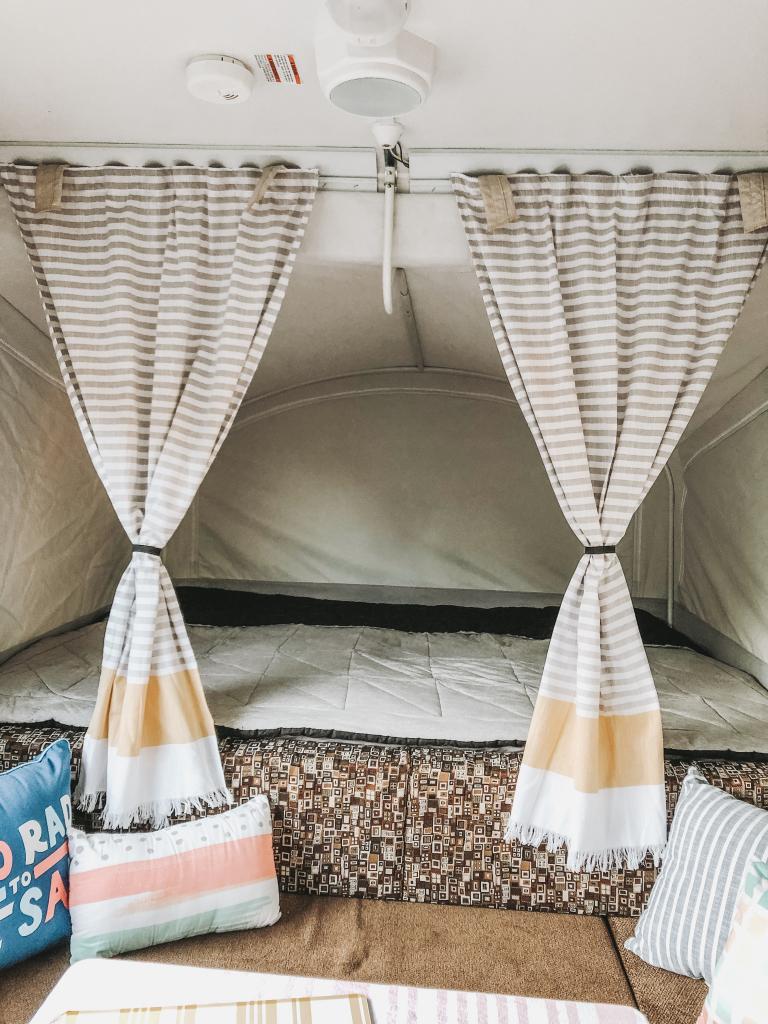
Make curtains or window covers if you have an RV or campervan in order to keep the light out (and to give your tiny house more privacy, of course!). Here, we’ll show you how to make your own campervan curtains on a budget by comparing several types of window coverings and providing a step-by-step tutorial.
- Who Makes Arctic King Air Conditioner? What Makes Arctic King Air Conditioners Stand Out From the Competition?
- How To Reduce Noise From Outside Air Conditioner? Best Guide
- Who Owns Carrier Air Conditioner For Your Home?
- How To Clean Polyurethane Recliner? Comprehensive Guide
- How To Dry Firewood Fast? Step-by-Step Tutorial
When it comes to van building, window coverings are often disregarded.
Bạn đang xem: How To Make A Curtain For A Campervan? Complete Guide
The most crucial features of a window treatment are:
- privacy
- obstructing the illumination
Getting dressed in your campervan will be difficult if not impossible if you do not have adequate window coverings or curtains. In the woods, it’s not a big deal, but in the city, it’s not so fantastic!
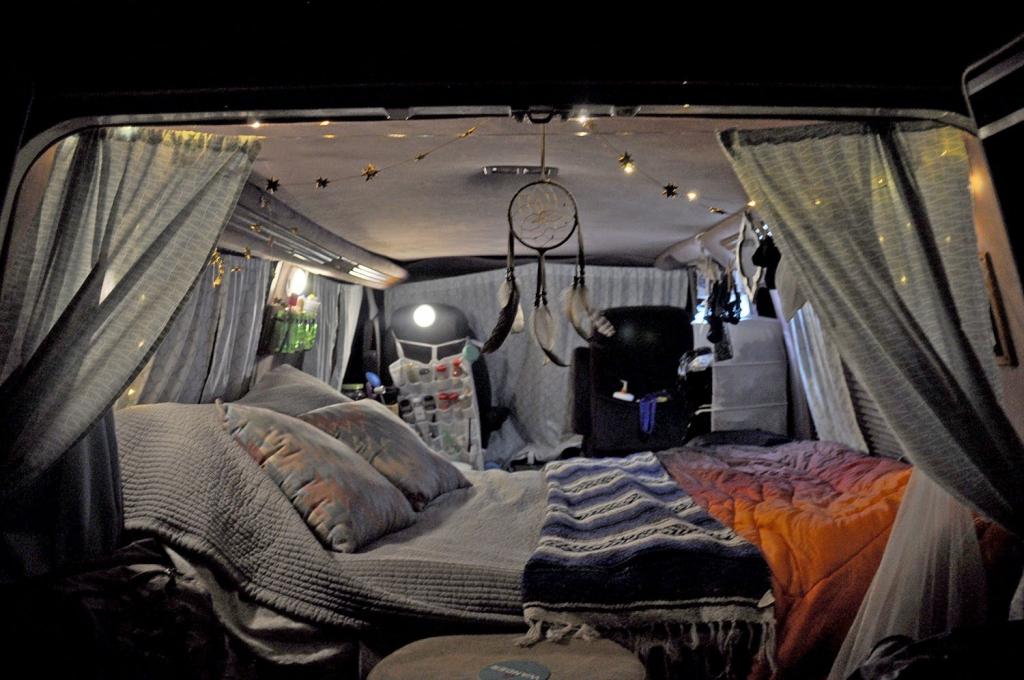
Campervan drapes, in addition to providing much-needed seclusion, also block out light, whether it’s the full moon or street lights in a Walmart parking lot. With light flowing in, it’s impossible to get a good night’s sleep…
It’s now time to discuss window coverings for your campervan.
Everyone’s vehicle has a unique window configuration. A lot of people own a van with a lot of windows that need to be covered. For others, they buy a cargo van with no windows but decide to make their own windows in order to get some natural light.
You might have just one window… You may have six.
Regardless of your circumstances, you’ll need to outfit your campervan with some form of window treatment.
We’ve taken two quite distinct approaches to this. Before we get into the specifics, here’s a quick rundown of each approach:
DIY Campervan Curtains
- add an element of privacy
- obstruct some of the light
- help with temperature control but not at all (unlike insulated covers)
- cheaper
- the process is more straightforward
- DIY is completely doable
Insulated Window Covers
- You’ll have complete privacy thanks to the magnetic seal and the strong seal.
- obstruct the rays
- insulation is a big issue for vans, which will be discussed in greater depth later.
- more costly
- the process is more time-consuming
- DIY is completely doable
Which is better: Curtains or Insulated Window Covers?
The advantages of each are as follows:
You will get more benefits (insulation, total blackout and complete privacy) by using insulated window coverings than you will by using ordinary curtains.
However, creating curtains is a lot easier and less expensive. If time and money are your top priorities, I think you’ve found the answer you’ve been looking for.
You may already have an idea of which solution is best for you after reading through the basic bullet points above.
When in doubt, let us explain the pros and cons of each choice so you can make an informed decision. We’ll go over how to make each one, as well as the expected cost and time schedule, in the next section.
Insulated Campervan Window Covers
I was sold after witnessing others talk about their magnetic window covers that simply snapped into place.
When we started building our second campervan, I told Ben, “We’re definitely getting these,” and he agreed. That’s when I noticed the price.
When it comes to purchasing insulated window coverings for your car, they’re not exactly inexpensive.
When we were looking for the best possible price for our project, we looked at estimates from four different firms, including a tiny family-run business with ethically sourced materials and cute patterns (the most expensive) to one that manufactures basic coverings with function over appearances in mind (the cheapest of the bunch). Then there were two more in the middle of everything.
Average cost of $627 was found among the four companies.
The answer is yes.
Here’s the link to that firm if you’d like to check them out: $460 for 4 window covers.
It’s understandable if you’re squirming at the price of this, which includes seclusion, a blackout curtain, and temperature control. Ours, too, was.
Another option is available.
Make Curtains Instead
Xem thêm : How To Build An Elevator Bed? Step by Step Instructions
We have a simple DIY curtain tutorial for those on a shoestring budget. Just know that covering your windows with an insulated magnetic cover is going to be far superior. You can always “upgrade” this later on.
Make your own Insulated Window Covers and Save $$$!
To avoid spending hundreds of dollars on window coverings, you could be nodding your head as you read this and saying to yourself, “Yes. I need insulated window coverings now.” You’ll be quite happy to hear this.
My own window coverings took hours of study, calculating, and design on my part. A wide variety of materials were purchased and tested out by myself.
As a result, I walked away with the winnings.
All by myself, I learned how to produce these infamously pricey window coverings. and I’m going to show you exactly how I did it!
I’m speechless at the impact these window coverings have had… they’re game-changing, to say the least. When I first saw these insulated window covers, I was a little disappointed, but now I’m sold!
Psst! I have no prior knowledge of sewering. My guarantee to you is that you can construct these window coverings just as well as I did.
To put it simply, Insulated Window Covers are a game changer.
a) Temperature Control
These insulated blankets kept our van cool during the hot summer months. As soon as we removed the covers, you could feel how hot the glass was because of the insulation.
We’ve also used our magnetic window covers to keep the chilly air out of our van during the Oregon winter.
b) Privacy
Remember how I mentioned our curtains had a small rip in the seams? Occasionally, we’d find ourselves in a situation where individuals would try to peer through the gaps in our clothing. Why is this happening?
No gapping (is that a word?!) occurs with these magnetic window coverings. There’s no way someone could get a peep inside.
c) Blackout status
The heavier and darker the cloth, the better the DIY campervan curtains would turn out if we were to make them again. In spite of its appealing aesthetics, the light-colored material proved to be a poor choice for obstructing light.
A humiliating story: We quickly discovered that even when the curtains were shut, our shadows could be seen from the outside. Ben found this while strolling back to our van from the bathroom and witnessing my shadow undressing. Yikes!
While our magnetic covers are completely blacked out, we do not have this issue with our other products. Even in the middle of the night, you can’t see a speck of light emanating from inside our vehicle while we gaze at the night sky. The entire city was plunged into darkness. When you’re camping in a city, it can be helpful to not be able to see that anyone is inside the van.
The lack of streetlights or a full moon makes it easier to go off to sleep.
It can be difficult to get out of bed in the morning because it’s so dark inside! But isn’t that the purpose of alarms?
d) Simplicity
These puppies are a cinch to install thanks to the window cover’s magnetic border.
Snap bracelets were huge in the late ’90s, and they’re still trendy now. (Am I getting older, or is it just me?) Those window coverings, on the other hand, have a gratifying click when they snap into place.
There is no need to adjust or secure these window coverings while they aren’t in use.
What you will need
Using a drill and a sewing machine, you can easily make your own campervan curtains. In the absence of either of these, the process is still possible, but it will be a bit more time- and effort-consuming!
Do I need to have a sewing machine?
Certainly not, but this will speed things up. Using a needle and thread, you may hand-sew your curtains. Check out this Wiki How tutorial to learn how to thread a needle! Watch this video from With Wendy! to learn how to hand-sew!
Curtain material
The most crucial part of your campervan curtain construction is this one!
It’s up to you how much money you want to spend on the material for your van curtains. I went to my local curtain shop and found enough material in their discount bin to meet my requirements. In addition to an existing blanket or even a towel, you may also use an old one. Or a worn-out duvet. However, you can get a variety of different fabrics for as low as $10 at various fabric stores!
You can also go to a sewing shop and choose the fabric you like best. Because of this, it may be more costly. Most fabric costs at least $10 per metre.
Xem thêm : How To Replace A Swivel Lane Rockers Recliner?
Also, if you want to keep the light out of your camper, a heavy blackout fabric works best.
Curtain cord
Wire and clips are the cheapest choice for making your own camper curtains. Below are some examples. (Also known as a pole for a curtain.)
For less than $5 a meter, you can find this at most sewing and curtain stores. My estimate is that I got about 4-5m for less than $20. Curtain cord should always be purchased in excess of what is actually required, and don’t forget the clips you’ll need to attach it to the screw in your van!
Tape measure
Measure the space in your campervan where your curtains will go before you cut your fabric to size.
Drill and drill pieces
Although this is not required, it will make things a lot easier! You’ll need a drill to attach the curtain cord to something in the van! Even without a drill and drill bit, you can still use your hammer and nail to get the job done! How and why you will use this will be explained in the steps that follow).
Screws
These can be used to connect the curtain cable in your van. Any size screw will do, but I recommend obtaining at least 8 of them!
Sewing machine
As I indicated earlier, this isn’t absolutely necessary, but it will speed things up. Using a needle and thread instead of a sewing machine is an option if you don’t have one.
Thread
You can use it with a sewing machine or needle. If your cloth is a specific color, you’ll want to acquire matching thread, but as a general rule, I recommend getting black and white thread, which you can get for as little as $2 at $2 stores.
Other items
- Scissors
- Velcro is a fastening system (if you want to connect two curtains together or stabilise them in the campervan)
- If you don’t have a sewing machine, you’ll need a needle and a lot of thread!
- Pins, to keep your needlework in place.
How to make DIY camper curtains
Step 1:
Measure the length and width of your campervan windows before beginning to build the DIY camper curtains.
This means you’ll need to figure out where you want them to go first. Do you want them to cover the entire length of the van, or are you content with just a few? You and your van are in charge of this.
Two sets of curtains covered my side windows (one set was broader than the other) and two drop-down curtains were installed on my van’s entrance and exit.
Make a note of your measurements for future reference.
Step 2:
Make holes in the campervan for the curtain cable to be plugged in. Depending on where you intend to run the wire, you may need to use a different number. For example, I put 5 screws in my van. Outside behind the driver’s and passenger’s seats, with screws connecting each of them to a back of the van kitchen in between each (I have a random shelf in between the perfect square so I had to include 5 screws instead of 4).
A drill bit will be needed to do this task. Because the perforations are so little and serve a purpose, I was apprehensive about this. To drive the screw into the metal, insert the drill bit (with the screw drill piece) into the hole you just drilled. Check to see if the screw has a lip as shown in the picture below.
It is possible to drill into the vehicle and then screw in the screw by hand, but this method is not recommended for those without access to power tools, such as hammers and nail sets.
Step 3:
Set the curtain cord in place after measuring it. Insert a hook into your curtain rope to do this. Place the hook around the screw that is already attached to the van and tighten it. Use your screwdriver to remove any slack from the rope before you begin to pull it towards the curtain. A screw should be screwed into the curtain cord on one side, and you should be able to clip the line in place!
Step 4:
Repeat the procedures above three times or as many times as you need to hang curtain lines!
Step 5:
Cut the required width and length from your material using the dimensions you took earlier. If you’re going to hem your curtains, you’ll want to leave some extra room at the top for the curtain cord to pass through.
Step 6:
It’s time to get down to business! Your DIY project to make campervan curtains will go more smoothly if you have access to a sewing machine. In the event that this does not happen, it could take a while. As a reference, you should pin the area where you plan to sew. Sewing can begin after the pins are in place to provide guidance. Hemming your fabric isn’t required, but doing so will help keep it from fraying.
Step 7:
You’re all set to attach your van’s curtains now! You’ll be able to attach the curtains to your van in no time if you slip the curtain cord through the opening at the top of the material.
However, to increase the safety of your drapes, I recommend the following solution:
Velcro dots can be used to attach your van’s curtains. They won’t be blown around by the wind.
With that in mind, I recommend securing your curtains with a cord as well. This was accomplished by simply cutting a strip from some leftover curtain material. Ribbon and rope are the same!
Step-by-step instructions on how to make your own camper curtains are provided in this article. Please do not hesitate to contact me if you have any concerns or questions concerning the procedure. This is just one of several methods to make curtains in your vehicle!
We used to push our windshield up to increase the blackout effect, and it was especially helpful because our front-curtain rails had a gap between them and the ceiling of the van.
Nguồn: https://iatsabbioneta.org
Danh mục: Home