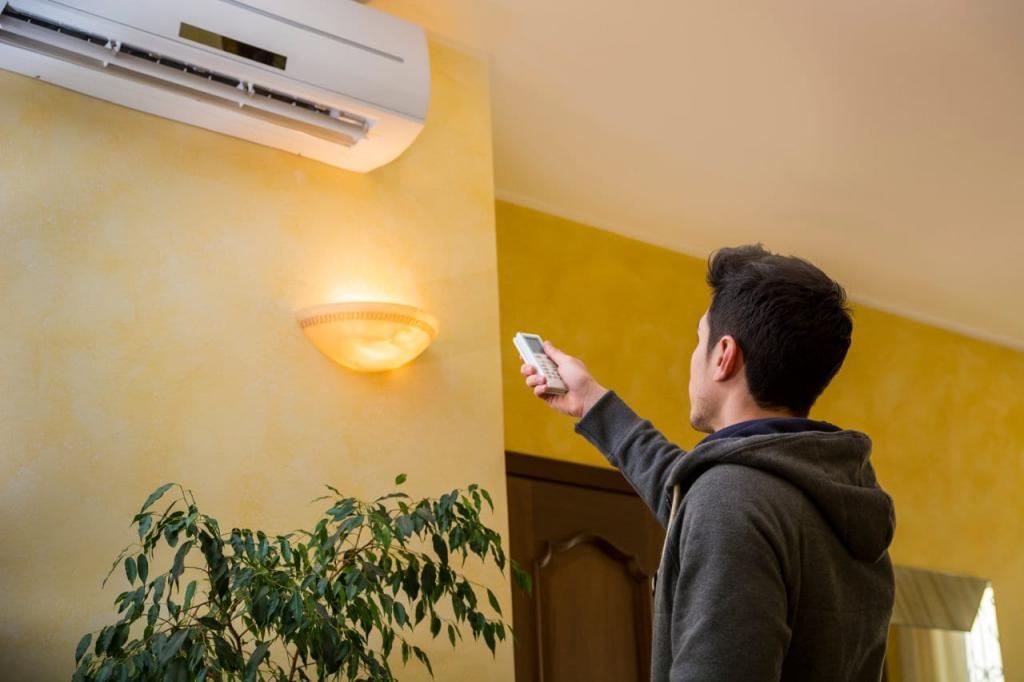
What if I told you that installing a through-the-wall air conditioner can be done in a matter of minutes?
That’s where this tutorial comes in.
Bạn đang xem: How To Install A Wall Air Conditioner Unit? 10 Easy To Follow Steps For You!
We’ll walk you through the basic procedures of installing a wall AC unit so you can begin using it right away.
It’s not as difficult as you would think, but you’ll need to put in some effort and be patient if you want to do it well.
Then, let us begin.
Why Should You Get a Through The Wall Air Conditioner?
You can skip this section if you already have a through-the-wall air conditioner.
It’s also possible that you’re still in the research process and want to learn more about how to install this type of AC before making a purchase.
Through-the-wall air conditioners have become more popular in recent years.
Both window air conditioners and portable units are now being beaten by these appliances because of their low cost, cooling capability as well as their permanent installation.
We’ll get into the list of benefits that through the wall air conditioners offer next, but if you do find that this is the right solution for you, we invite you to check out our best wall mounted air conditioner unit guide. Everything you need to know about choosing the right gadget for your needs and budget is laid out in this section.
- Average-sized air conditioners through the wall don’t need a lot of electricity to run. This helps keep your utility costs down and your wallet a little bit rosier. The average monthly operating cost for this device is between $20 and $30.
- This is a long-term solution to your cooling demands because the units are incorporated into the wall. Other types of air conditioners, such as window and portable models, necessitate their removal and storage during the winter months. Some folks may find this difficult.
- In addition to providing air cooling, certain wall air conditioners can also provide supplemental heat. With this, you may enjoy year-round comfort at the lowest possible expense.
Through The Wall Air Conditioner Installation: The Basics
To save time, this part about through-the-wall air conditioners can be skipped if you’ve already done your homework. To learn more about the advantages of these products, continue reading this section.
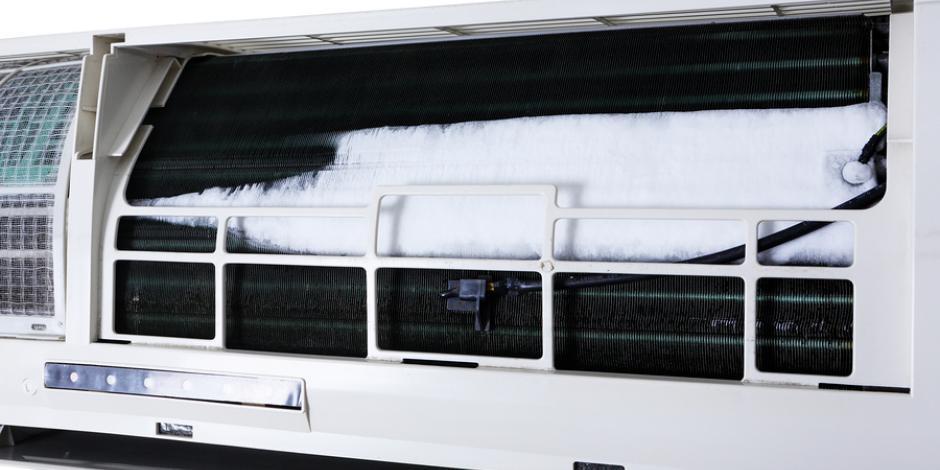
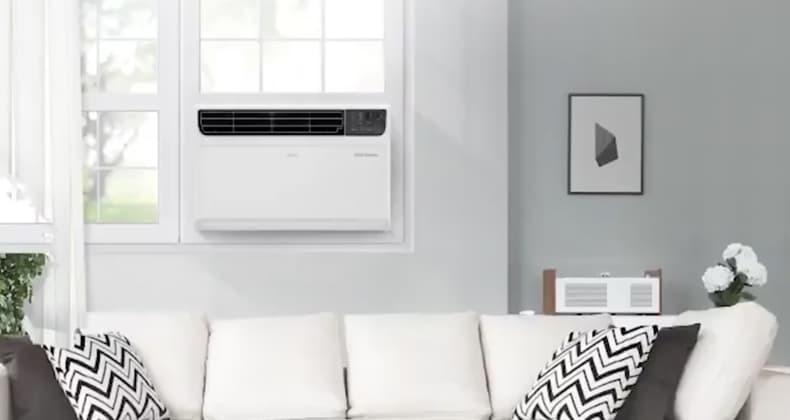
Through-the-wall air conditioners aren’t merely window units with a hole in the wall, as you may expect at first appearance. Vents are located on the back of the unit, rather than on its sides, as a functional difference. Window air conditioners are far more visible than through-the-wall air conditioners. It’s rather flush with the surface.
To be clear, mini-split air conditioners are not the same as through-the-the-wall air conditioners; despite their similar names, mini-splits have two independent units. When it comes to installing a mini-split air conditioner, screws and brackets are used instead of a large hole in your wall.
Benefits Of Through The Wall Air Conditioners
There is no need for ductwork in the installation of a through-the-wall air conditioner, unlike many other types of air conditioners. The air conditioner’s exterior and inside duties are handled by a single unit. A through-the-wall air conditioner is an excellent choice if you need to make full use of your window because, for example, it’s your sole fire escape route.
As with window air conditioners, through the wall air conditioners can be incredibly energy efficient to run. Here, you may learn more about how much electricity certain air conditioners use.
Potential Downsides Of Through The Wall Air Conditioners
With a through-the-wall air conditioner, proper insulation is vital. You’ll be making a hole in your wall that goes all the way out to the street. Insects and other pests will make their way into your home if you don’t insulate that hole correctly.
Cutting a hole is a serious undertaking in and of itself. In order to relocate the air conditioner, you will need to fill in and repaint the hole it was installed in.
While DIYers can install through-the-wall air conditioners, it might be challenging if you don’t know what you’re doing with tools or aren’t confident in your abilities.
How To Install A Through The Wall Air Conditioner
Tools Required
Acquiring all the necessary tools is necessary before installing your through-the-wall air conditioner.
By following these steps, you may maximize the speed and efficiency of your installation.
The following is a list of the things you’ll need to get this device up and running:.
- You should get a sleeve (sometimes known as a “bracket”) with your order. If you don’t have one, get one now.)
- With a Glue Gun
- Caulk made of silicone
- Tape Measure
- Stupidity Detector (or you can use a small penny nail for finding the studs)
- Paint
- Pencil
- Press bar
- Saw, Circular
- Cutting with a Handsaw
- Hammer
- Nails
- Level
- Pieces of 2 x 4 lumber (for framing)
- Bits and drills
- Knife for Various Purposes
- An entire drywall sheet
- Compound for drywall
- It’s a Drywall Cutter
Step 1: Choose a Spot
Look around the room to see where you want to put the through-the-wall air conditioner and then pick a decent spot for it.
Consider the most visually appealing sites and the places where you believe the message will have the greatest impact. Keep it close to an electrical outlet so that you can plug the device in after the installation is complete.
The bottom of the AC unit should be at least 1 to 5 feet above the ground. As a result, the air filter will be less likely to gather dust from the floor and less likely to condense on the ceiling if it’s placed lower in the housing.
Step 2: Mark the Wall Studs
Xem thêm : How To Winterize An Air Conditioner? Tips To Winterize Your AC Unit
Wall studs (2 x 4 lumber) are used to build and support walls, and they’re typically 16 inches apart.
To begin the process of cutting through the drywall, you need to mark the studs in the area where the appliance will be installed. You also want to decrease the number of wall studs you have to remove in order to speed up the process.
The following are your two choices:
- Identifying the studs with precision by means of a stud finder.
- Finding a location where the sound transforms from hollow to solid by tapping on the wall with your knuckles Then, hammering a small penny nail into the wall to confirm the right location. If you struck gold, congratulations. If that doesn’t work, give it another go.
Finding a location on the wall where the sound changes from hollow to solid by tapping on it with your knuckle After that, pound a tiny penny nail into the wall to make sure you’re in the appropriate spot. A stud is a nice thing. Retry if necessary.
Then, take a tape measure to the wall where the studs were indicated and measure the width of your through-the-wall air conditioner. You should have received an installation guide with your appliances, which you can use to sketch the contour of the appliance on the wall. In the event that you don’t have a sleeve (bracket), utilize it instead.
Cut through as few studs as possible by using a guide paper or sleeve as a guide.
Step 3: Turn Off Power to the Room
Find your house’s electrical panel (breaker box) and turn the breaker that controls the power to the room.. You don’t want to accidently cut through electrical cables while cutting through the wall in the next stage.
Run an extension cord from another room with electricity to power your saw and drill.
Step 4: Making the Hole
Trace the outline of the air conditioner on the wall using the guiding paper or sleeve provided.
Make sure your outline is level by using your level tool while you are marking it.
Make a second outline, this time 2 12 inches larger than the first. Having this extra space will allow you to build a 2 x 4 lumber frame for the unit’s supporting structure.
Then, using a drywall knife, make a score around the perimeter. Strike vertical lines above the wall studs, as well.
Hammer down in the middle of the scored sections of wall so that they pop out easily. Instead of hammering these bits of drywall out, you might use a hand saw to cut them.
Remove all of the drywall to reveal the wall studs. You should also cut away any insulation that is in the wall to match the opening you made in the wall.
Step 5: Cut Through the Wall Studs
In order to make the wall opening flush with its contour, use a circular saw to cut the wall studs that are located inside it.
Step 6: Construct a Frame for the Air Conditioner
In order to cut two 2 x 4s to the same length, you must first measure the wall opening width.
The combined thickness of the 2 x 4’s you just cut should be subtracted from the wall opening’s height. Afterwards, cut each of those to the appropriate length.
Make a frame out of those four 2 × 4 pieces of lumber. Assemble everything.
Slide the 2 x 4 frame you constructed into the wall opening and fix it with as many nails as you can find in the wall studs.
Step 7: Create a Hole In The Exterior Wall
Each of the four corners of the inside frame that punches through the outer wall should be drilled using a drill.
The holes in the outer wall will serve as a guide for you to determine precisely where you need to cut.
Draw four straight lines connecting the holes on the external wall with a pencil and a level.
Cut the outside material with the circular saw so that the inside and exterior holes are now perfectly aligned.
Step 8: Installing the Through the Wall AC Unit
As instructed in the instruction handbook, insert the metal sleeve (bracket) into the wall aperture.
Incorporate the gadget into its sleeve, and then fasten it to the bracket.
Xem thêm : How To Install A Window Air Conditioner In A Wall?
Connect the power cord to the nearest available outlet.
Step 9: Completing the Installation
Cut and fix any exposed drywall around the appliance with the new material.
Use drywall nails to fasten it in place.
Using drywall compound and a drywall knife, fill in any gaps or holes.
The drywall should be primed and painted to match the color of the existing wall.
Using a caulking gun, apply a thick bead of silicone caulk around the unit’s borders on both the inside and outside of the house. Having this installed will keep the air from leaking in or out of your home.
Trim or molding can be installed around the device to give it a finished look.
Step 10: Turn the Power Back On
Switch on the breaker for the room so that the room’s electricity is restored.
Take advantage of the cooling benefits of your air conditioner by turning it on now.
Advantages of Wall Mount AC Units
In spite of their age, wall-mounted air conditioners have proven their worth throughout the years. They’ve got
There are several advantages, some of which are given here.
- Wall-mounted air conditioners are the greatest because of their affordability. Most people can afford them, unlike high-end air conditioning units that cost thousands of dollars.
- It’s possible to purchase the right equipment for your room’s size and area because they come in a variety of types and designs.
- Inverter technology in newer equipment saves energy and lowers your utility bills by a significant amount.
- Wall-mounted air conditioners are easy to run and handle because they come standard with air conditioning filters and wireless remote controls.
- When your AC isn’t operating, you’ll be able to open your windows and breathe in the fresh air that they were designed to provide.
Installing a Wall Mounted AC Unit
Even if a room does not have central air, a wall-mounted AC can be installed. Window air conditioners have a similar installation process. Some of the various features of a wall-mounted AC installation procedure are outlined here in just five simple steps.
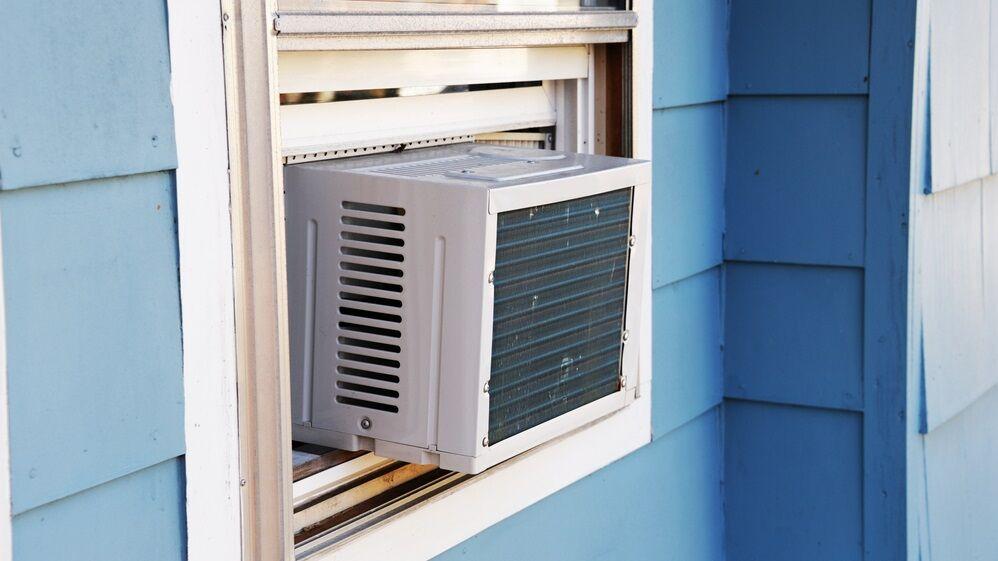
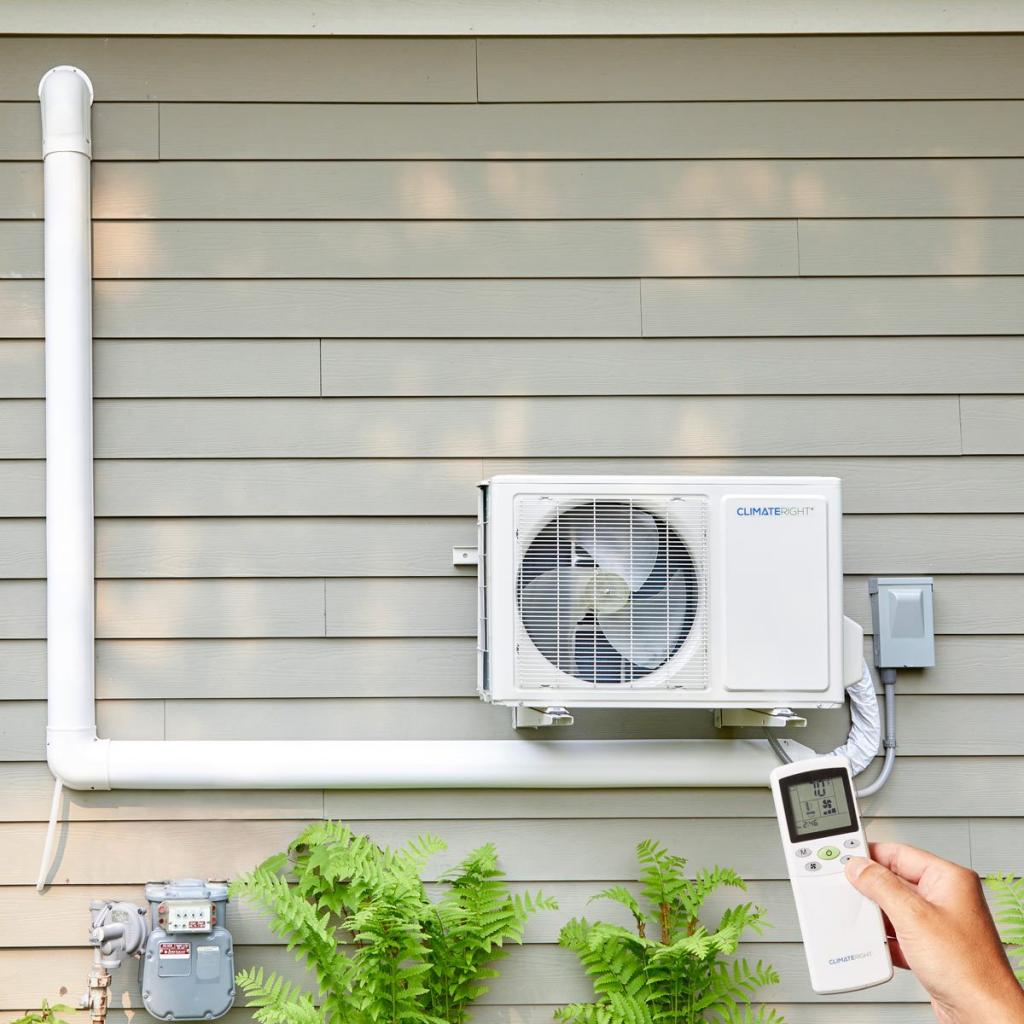
- A wood frame or backing plate may be needed if you’re installing a surface-mounted unit like the one seen above. If so, this can be purchased locally, finished to your liking, and placed straight into the wall studs with wood screws.
- If you’re putting a through-the-wall unit, figure out where on your wall you can get the best coverage for the entire space. A well-placed installation point ensures that the air flow is evenly dispersed throughout the space, and that the room’s overall aesthetic is at its finest as well. Pick an area of the wall that does not have any internal wiring, pipes, or electrical fittings.
- Make sure the wall is marked with the size of your air conditioning unit after you’ve decided on a position. As a general guideline, you should always measure three times before cutting once. As an amateur handyman or someone who has never worked with wall board, it may be in your best interest to practice some basic skills, such as drilling and cutting. Even if you’d like to have a professional handle this for you, it’s perfectly acceptable.
- Always use a frame when installing a through-the-wall unit to help support the unit’s weight. If the unit is in direct touch with the wall, moisture and current passage are also significant risks that could occur. When deciding where to put the air conditioner, a plywood or wooden frame comes in handy. Do not press or force any portion of the AC unit, as this could cause it to malfunction.
- The AC shell (case) can also be installed first, and then the AC chassis can be inserted once it is snugly fitted. If there is a faulty push or force, it will only harm the case, which can be fixed more quickly. This avoids any component damage.
- Insulation pieces or silicone caulk can be used to fill in any gaps between the unit and the wall, keeping moisture and heat out of the device’s reach.
In the event of an emergency, it’s best to take precautionary measures.
- The main electrical supply should not be turned on until the installation process is complete.
- As an added benefit, installing beneath a window eliminates the need to add headers to support loads while also concealing the visible hole in your wall. However, keep an eye out for window-mounted outlets.
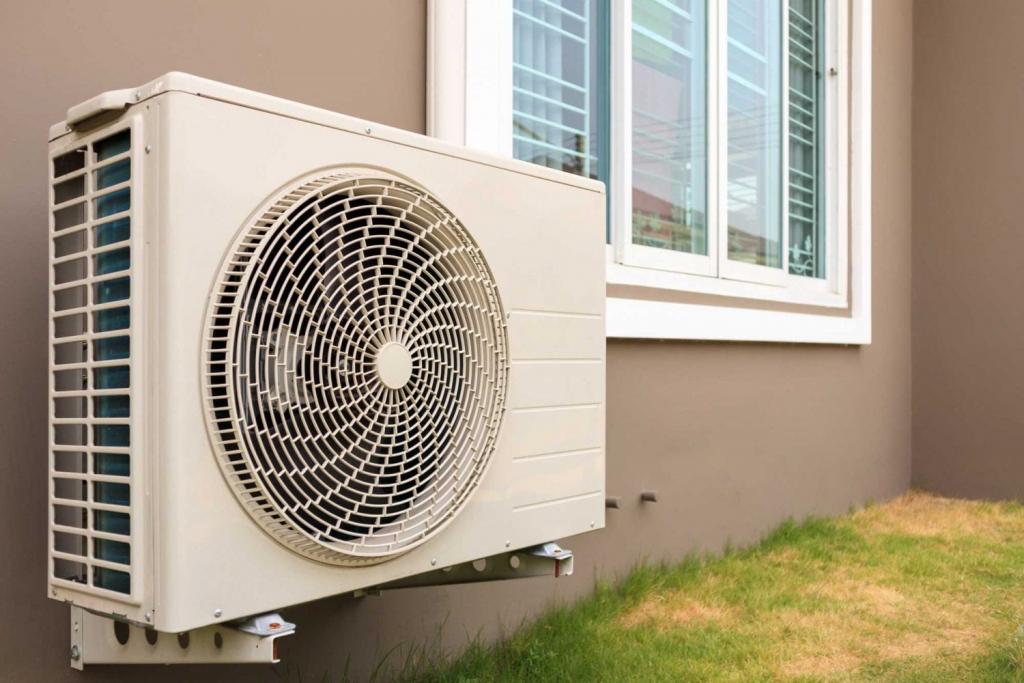
- Keep the rear of your through-the-wall unit clear of dust, moisture, leaves, and oil, since these substances may interfere with the operation of your AC unit. The same holds true for the wall-mounted, split-AC models’ exterior units.
- Work on installing wall-mounted air conditioners calls for the use of safety gear such as work gloves, shoes, and a first aid kit on hand at all times.
Important Guidelines
Now that we know how to install a wall-mount AC unit, we should also be familiar with the many types of wall-mount AC units available so that we can make an informed decision based on our own preferences and requirements.
- Almost every other country in the world uses 220 volts, while Americans use 110 volts. You will require a voltage converter if your AC unit is only designed for usage in a 100 volt supply area. Most modern AC systems, on the other hand, come pre-installed with a 110-220 volt transformer.
- For the initial coolant charge and wiring inspection, you’ll probably want to hire an expert.
- Keeping the air filters clean will help you save money on your utility bill. Foam air filters should be cleaned using a soapy solution, whereas paper air filters can be cleaned by tapping and dusting.
- Check to see if your equipment has an Energy Star certification. The lower your electricity bill will be if your appliance has a high energy rating.
How Much Do Through The Wall Air Conditioners Cost?
If you haven’t already, you might be wondering how much a through-the-wall air conditioner costs now that the installation guide has concluded.
According to our best wall mounted air conditioner unit guide, the overall cost of purchasing and maintaining an air conditioner actually depends on how much space you need to cool.
As for the most efficient wall air conditioners, here are some things to look forward to:
Through the Wall Air Conditioner Total Cost Chart
Thanks for reading our tutorial on installing a through-the-wall air conditioner and learning about total costs.
It’s not too difficult to install as long as you have all of the essential tools and follow all of the appropriate instructions. A wall-mounted air conditioner is a cost-effective solution to keep a room cool.
Frequently Asked Questions
How much does it cost to install an air conditioner in the wall?
Wall AC unit installation costs an average of $2,400. If you’re hiring someone else to do the work, you’ll have to pay for both the parts and the labor. Installing your own system can save you $50 to $100.
Can you put a window air conditioner through the wall?
Generally speaking, window and through-the-wall air conditioners are not compatible. However, certain window air conditioners can be adapted with special sleeves to make them operate like wall air conditioners. This is possible. This is unusual, given the fundamental differences in design between window and through-the-wall units.
Do through the wall air conditioners need a sleeve?
Yes! Without a sleeve, the wall will not be able to withstand the added weight of a through the wall air conditioner. Deforming the wall will be the eventual result. Sleeve or slide out chassis is the most common design for through the wall ACs.
Are all through the wall air conditioners the same size?
The normal size of through-the-wall air conditioners is 26′′ by 16′′.
It’s A Wrap!
You can now switch off the power to the room by reversing the breaker you used to install the wall air conditioner.
The temperature in the room will be just right as soon as you turn on your heater.
Nguồn: https://iatsabbioneta.org
Danh mục: Conditioner