In order to start a live poinsettia plant from cuttings, you must wait until spring or summer.
- How To Use A Cloning Machine? A Perfect Guide For You!
- How Long Do Orchids Live? Common Question And Answers
- How To Make A Small Greenhouse For Seedlings? Easy Step-by-step Guide
- What To Watch For When Growing Cannabis In A Greenhouse? Comprehensive Guide
- How To Grow Ice Plant From Cuttings? Easy Step-by-step Guide
It’s ideal to take cuttings from young, active growth, says Curtis W. Smith, Ph.D., a New Mexico State University Cooperative Extension Service Extension Horticulture Specialist.
Bạn đang xem: How To Grow Poinsettia Plants From Cuttings? Easy Step-by-step Guide
The chances of success are lesser if you try to begin this project in the dead of winter. But you have the option.
Gather Your Materials
Before you begin, gather all of your materials and check to see whether you have everything you need on hand.
You’ll need the following:
- A poinsettia plant that is thriving and showing signs of life.
- A pair of disinfected scissors or pruners.
- A seed starting flat or a tiny nursery pot that has been sterilized.
- Coconut coir, potting soil, or a blend of vermiculite and perlite are all examples of growing media.
- Cover the plant with a humidity dome or transparent plastic bag.
- A spray bottle or mister.
- Potting up rooted cuttings in 4- or 6-inch pots.
- Rubber gloves or gardening gloves are acceptable (optional).
- Hormone responsible for rooting (optional).
Each of these topics will be explained in detail as I walk you through the seven processes. Before beginning, it’s a good idea to go over the entire procedure with fresh eyes.
Propagate Poinsettias in 7 Steps
After waiting for the right time and gathering your supplies, it’s time to get started! Ready? All aboard!
1. Protect Your Skin and Eyes
Gardening gloves or rubber dish gloves may be necessary before you get started. When you cut or break a poinsettia, the white sap that comes out can be quite unpleasant, especially if you are allergic to latex.
Regardless of whether you are allergic to latex, avoid getting sap in your eyes at all costs. Consider using protective goggles as an additional layer of protection.
Let’s get down to work now that the safety discussion is over.
2. Choose Your Containers
Make sure your containers are ready for your cuttings by preparing them ahead of time.
Because they will only be used during the first four weeks of the cutting’s life, these containers don’t need to be overly large.
Seed starting flats, like these from SOLIGT, can be used to start your young poinsettias.
A Humidity Dome Grow Tray
You can use the humidity domes that come with them to keep your cuttings moist once they’ve been inserted.
Alternately, small nursery pots or even plastic cups can be used for the initial germination. When reusing nursery pots, disinfect them first.
3. Add Growing Medium
Flower foam or peat moss is used by commercial poinsettia growers as a starting point for the cuttings of their plants.
You don’t even need to start the cuttings in soil if they can develop in foam, because that indicates that they don’t require moist soil for growth.
It’s preferable to use an environmentally friendly seed starting mix rather than floral foam or sphagnum peat moss, which are both bad for the environment.
Coconut coir is a better alternative to sphagnum peat moss in terms of environmental impact.
Compressed Chips-N-Fiber by Prococo
Prococo’s Chips-N-Fiber is a high-quality coconut coir product that’s free of germs and fungi, making it suitable for your new plants. In addition, it is compressed, which means that it occupies less storage space.
Vermiculite and perlite can also be used as an alternative.
Seed starting flats like the one described above allow you to add your growing medium right into the flat itself.
Depending on the length of your cuttings, a potting medium depth of two to three inches is recommended.
The potting media should not be wetted down in any way. Until the roots of your tiny Christmas flowers are established, they will get their water from their leaves, not from the soil as you would expect. Below, I’ll go into more depth about that.
Make holes in the potting mix where you plan to place your cutting. A chopstick, a pencil or your finger can all be used for this.
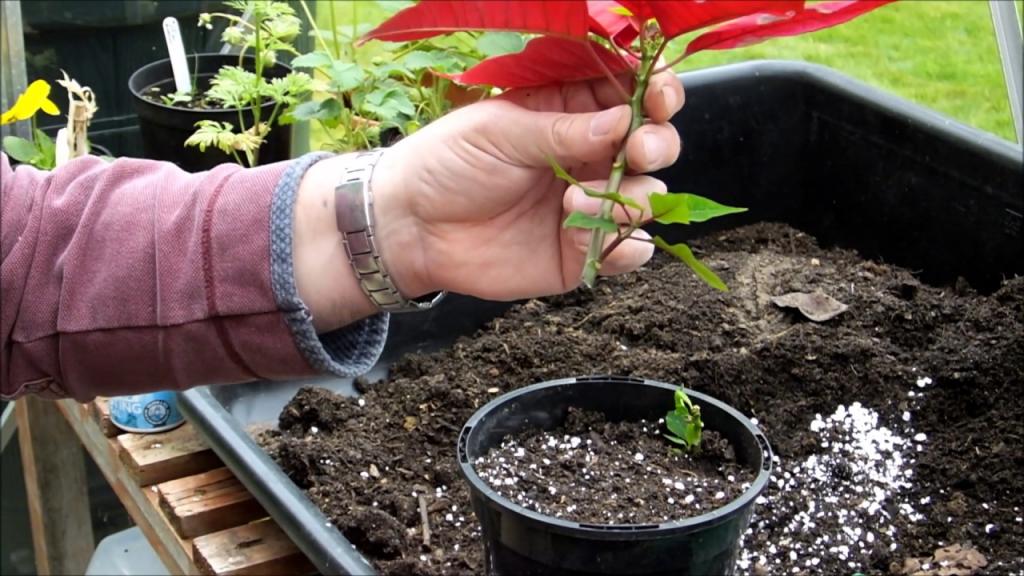
4. Take Cuttings
It’s time to take some cuttings from your plant now that your containers have been filled with your choice medium.
Use your sterilized pruners to snip off a three to four-inch portion of the branch.
If you prefer, you can just pinch off a cutting with your fingertips, but be wary of the sap, as previously said.
Xem thêm : How To Transplant Phlox? Comprehensive Guide
Next, remove the cutting’s lowest leaves by pinching or cutting them off. This will aid in the formation of roots from the leaf nodes, as well as from the stem’s base.
To ensure that the cutting receives the moisture it needs from the foliage, leave at least two or three leaves on top of it.
5. Apply Rooting Hormone
This section can be omitted. Using a rooting hormone can go a long way toward encouraging your cuttings to sprout new roots.
Fill up any exposed stem and lower leaf nodes with a powder or gel before applying to cutting’s bottom side.
You can use a small bit of rooting hormone on a piece of scrap paper instead of simply dipping the stem into the container of gel or powder for the process.
This could assist extend the life of your rooting product.
Make sure the cutting is inserted into the hole in the growing medium, and that the bare leaf nodes go all the way into the medium, after administering rooting hormone
You can avoid rubbing off the rooting hormone by inserting the stem into soil or coir with pre-poked holes.
If you’re looking for a rooting hormone, Olivia’s Cloning Gel is the one for you. So you don’t have to worry about inhaling it because it is gel rather than powder.
A cloning gel created by Olivia
Arbico Organics sells Olivia’s Cloning Gel in two-, four-, and eight-ounce bottles.
6. Place in a Bright, Humid Location
It’s time to spray your cuttings now that you’ve inserted them all into your growing medium.
You can sprinkle or spray the leaves of your new plants.
As long as the spray bottle never contains any chemicals or cleaning goods, a plastic one will do.
Glass spray bottles can be used to water your young poinsettias if you prefer something more attractive for plant care.
The quality of your water can determine whether or not your young plants survive or succumb to the elements. Many plants are sensitive to toxins in municipal water, and bacteria and minerals in well water can also impact them. They can also be affected.
Whenever I’m taking care of indoor plants, I only use filtered water from the faucet.
Cuttings of poinsettia do best when the relative humidity is between 90 and 100 percent.
When it comes to providing your newborns with the high humidity they need, you can either put them in your greenhouse or keep them under a humidity dome.
Plastic bags can be used to make humidity domes if you’ve already started your seedlings in small nursery containers or plastic cups.
Provide bright, but not direct, indirect light for your new plant family members. A grow light can brighten up a dimly lit home.
The poinsettia-to-be are getting the moisture they need through their leaves – they don’t have roots yet – so don’t water them. Instead, mist them every day.
Okay, so far, this seems rather simple, don’t you think? This is where things get a little dicey.
It is important to keep in mind that while cuttings of poinsettia require high humidity in order to thrive, they are also more susceptible to bacterial and fungal illnesses because of the high humidity.
Keep some low-power fans running at all times for expert poinsettia growers to deal with this issue (which can also help strengthen the branches).
If you’re gardening in a greenhouse, it may be simple for you to maintain these plants in a moist but well-ventilated atmosphere.
If you have a home that has a high level of humidity but not enough ventilation, it might be a challenge.
Take more cuttings than you think you’ll need just in case some of them don’t make it.
Even if you’re just growing one plant, it’s best to keep your seedlings at least a few feet apart from each other in order to keep them from becoming infected with bacterial or fungal diseases.
Using a fan on a low setting will also assist circulate the air in the room.
If all goes according to plan, your tiny poinsettias should flourish and sprout new leaves soon. Poinsettia cuttings grow roots in about ten to fourteen days.
7. Pot Your Rooted Cuttings
When your young plants are four weeks old, they should have developed enough roots to be transplanted into pots. Use well-draining potting soil and pots with drainage holes for transplanting — Christmas flowers don’t like to have their feet soaked.
For a fuller-looking plant, space three cuttings out over a seven- to eight-inch pot, or insert one cutting in the middle of a four-inch pot.
Xem thêm : How To Propagate Chinese Evergreen Aglaonemas? Comprehensive Guide
You can now water your plants as normal after transplanting.
Make sure the drainage holes at the bottom of the pot are completely filled with water. Between waterings, the soil should feel dry to the touch.
Your poinsettias can also be placed outside in partial shade if your climate is warm enough and temperatures are kept above 50°F.
Poinsettias, if left unchecked, will develop into huge, lanky plants.
When the rooted cuttings are about six weeks old, pinch the shoot tip back to encourage branching.
I’ll try to explain:
A few leaves were stuck to the stem when you made your cut.
Take a look at the roots of your plant. There should be a growing tip, followed by a couple of larger leaves.
Pinch only the top half-inch or so of the developing tip that grows straight up from the stem.
The plant will send out new shoots at the following leaf nodes if you pinch the growing point back. As a result, one shoot is removed, but two are gained in its place. The more shoots your plant produces, the more flowers and color it will produce.
To be in time for the end-of-year festive color, start this process by the beginning of September.
If you want your poinsettias to be as colorful as possible, you’ll need to expose them to a period of extended darkness.
When exposed to long, dark evenings, poinsettias—which are photoperiodic plants—florize.
Creating these conditions may require a lot of time and effort, but it’s well worth the effort when you see the beautiful color of your homegrown Christmas bloom.
Grow Your Own Holiday Joy
These are the seven steps to successfully producing poinsettias in your own yard.
With a little bit of luck, you’ll be able to decorate your home with homegrown poinsettias this season.
The question is whether or not you’re up for the challenge, gardener. Have you ever attempted to self-propagate poinsettias? In the comments, please share your story and any pictures you may have!
Please check out our other posts on the subject if you’d want to learn more about these winter-blooming plants:
Easy Guide On How To Grow Poinsettia Plants From Cuttings
New Mexico State University advised gardeners to keep in mind a crucial point before starting to grow poinsettias from cuttings. You’ll need to find out if your plant is protected by a patent before you may propagate it. In the event your plant isn’t patent-protected, it’s safe to collect cuttings and start new plants.
Step #1. Taking cuttings
Poinsettia cuttings can be propagated best in the summer when the plant is actively developing new growth. Propagation is easy with these fresh shoots at the base, but wait until they’re at least 5 inches long. Even more importantly, your parent plant should be in good health, with no symptoms of illness or damage on its stems.
After the flowers have faded, trim the stems of the original poinsettia plant to prepare it for transplanting. As the old branches are no longer useful for propagation, this will allow for the growth of new ones. Keep the plant hydrated and in a bright, warm location.
Use a sharp and sterilized pruning shear to take a 4-inch stem from the base. It’s best if the cutting has a few leaves at the end of it. Much like with other plant cuttings, you want to remove the leaves at the base, so the node is exposed, and then dip the cutting’s end in rooting hormone to help with establishment.
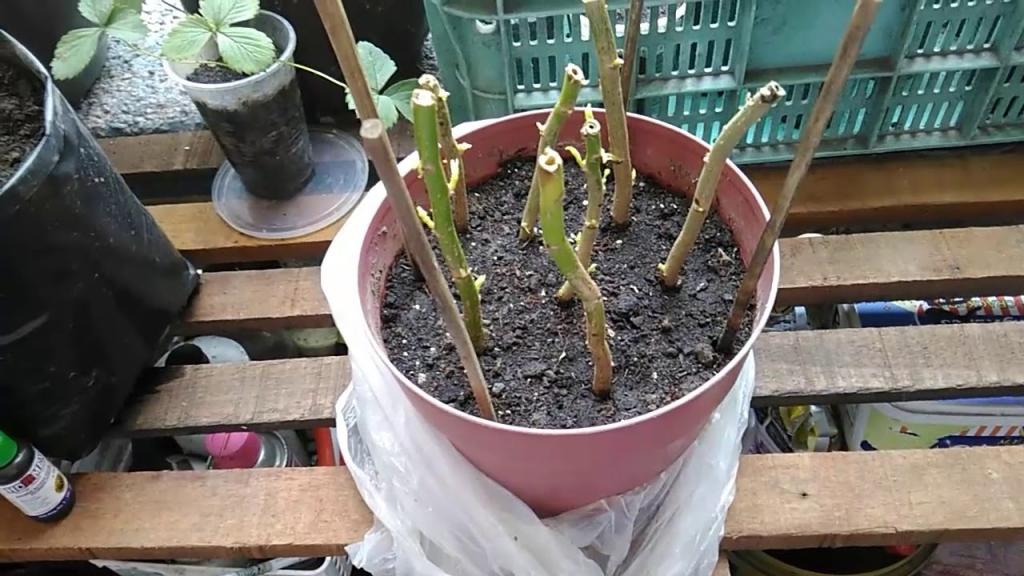
Step #2. Planting
Use a sharp and sterilized pruning shear to take a 4-inch stem from the base. It’s best if the cutting has a few leaves at the end of it. Much like with other plant cuttings, you want to remove the leaves at the base, so the node is exposed, and then dip the cutting’s end in rooting hormone to help with establishment.
Take a 4-inch stem from the base and cut it with sterilized pruning shears. It’s ideal if the cutting has a few leaves at the end of it. Much as with other plant cuttings, you want to remove the leaves at the base, so the node is visible, and then dip the cutting’s end in rooting hormone to help with establishment.
Stem the plant by cutting off a 4-inch section at the base with a sterile pruning shear. Ideally, the cutting should have some leaves at the tip. Roots hormone can be applied to the cutting’s end to aid in the process of rooting, just like with other types of plant cuttings.
Continue to water the transplants in the greenhouse while maintaining a somewhat humid but bright environment. Poinsettias can be planted in a moist bed in a medium shade in the fall. Remember to bring them inside if it becomes too cold outside.
Caring For Poinsettia Plants
Proper care allows poinsettias to bloom for longer periods of time. If the weather isn’t too harsh, you might be impressed by these plants’ ability to remain vibrant until March. For those who live in colder climates, a greenhouse can keep your poinsettias safe from frost damage.
There should be no cold air or drafts, however the air should be slightly humid for these plants. Keep them out of direct sunshine, but they’ll get stronger as they get more light. In addition, keep the medium moist and draining, and fertilize it once a month during the growing season.
What are the most prevalent issues with poinsettia cultivation? The greenhouse is a breeding ground for pests, including spider mites and thrips. You can stop them from spreading if you keep a close eye on them.
If pesticides are absolutely necessary, Michigan State University has chemical suggestions that are safe for poinsettias. Management measures can also readily prevent additional problems in poinsettias, such as soft rot caused by bacteria, powdery mildew, and botrytis blight. As long as they do occur, you can alter your environment and manage the ailment as needed.
Conclusion
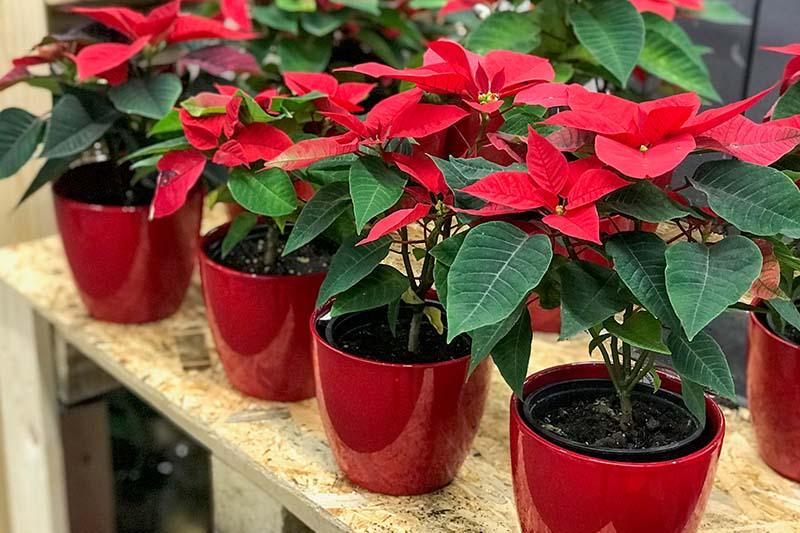
Poinsettias, whether they’re blooming for the holidays or not, are guaranteed to brighten up your garden. Creating more clones of your favorite poinsettia plants is simple if you know how to cultivate them from cuttings. To get you in the holiday spirit, all you need to do is follow this simple procedure to propagate your favorite plant.
Cutting stems from a healthy parent plant is the first step. Prior to planting, remove any remaining lower leaves and treat the cutting with a rooting hormone. To keep the humidity up, place the pot in a plastic bag and allow it to air out.
Nguồn: https://iatsabbioneta.org
Danh mục: Garden


