A tiny walk-in greenhouse is not a priority for those who want to learn how to build one for their garden. In order to create their own greenhouse, they do their study, come up with a good set of ideas, and get to work.
If you have a small-walk-in greenhouse in your backyard, you can enjoy your favorite plants all year round. When it comes to creating a greenhouse, adopting the DIY approach isn’t as difficult as you would think it is. You don’t have to go through a lot of work to do this task.
Bạn đang xem: How To Build A Small Walk In Greenhouse? A Step-by Step Learning Guide
Tips for Building a Small Walk-In Greenhouse
Your greenhouse may be put together in just a few hours, which may surprise you. Whether you prefer a glass or plastic greenhouse, there are several low-cost DIY greenhouse kits available that allow you to quickly assemble and set up your own greenhouse.
The first step is to locate your tiny walk-in greenhouse in the best possible place. Water and electricity should be easily accessible. Ensure that the ground is level and that water is able to drain freely once you’ve chosen a location.
Over-exposing your plants might harm them, even if they get enough sunlight. A somewhat shaded location is therefore ideal for your greenhouse. The use of a shade cloth can be used to reduce the amount of sunlight and heat your plants are exposed to if you cannot find a covered spot.
For those who have the time and money, there are a wide variety of greenhouse designs to choose from, whether you’d prefer to build your own or purchase one of those prefabricated greenhouses. To create something from the ground up requires planning ahead of time and selecting the appropriate supplies. Determine the size of the greenhouse you want to build in order to get an idea of how much material you’ll need.
Do not forget to set up your greenhouse’s heating and cooling systems as well as the thermostat once it has been constructed. You’ll be able to better regulate the temperature in the confined space with the help of them.
What Color Should a Greenhouse Be?
Because white surfaces reflect light better than black ones, you’ll want to fill your greenhouse with as much white as you can. Plant pots should be the only thing in your greenhouse that is dark in color.
What Can I Grow in a Small Greenhouse?
Small-scale greenhouse gardening novices should be aware that plants thrive best in warm environments. Warm-season veggies can be grown inside by novices. Melons and other fruits will also be included in this list of vegetables.
As long as the nighttime lows are regularly above 50 degrees Fahrenheit, you have the option of moving them outside.
What are the Benefits of Greenhouse Gardening?
When you cultivate plants in a greenhouse, you get many advantages, like a protected growing environment, a place that serves many uses, more savings on grocery bills, and greater control over your crop’s quality. Look at these advantages in detail:
It provides your plants with a protected growing environment
Destructive pests and unpredictable weather are two of the biggest challenges of maintaining a traditional outdoor garden. Your delicate plants, on the other hand, benefit from a greenhouse, which shields them from the harsh elements, such as snow and hail as well as high winds and heavy rain. Because it lets you to regulate the environment in which your plants grow, you can ensure that pests and rodents are kept out while beneficial insects remain.
It’s a space that offers multiple purposes
With your greenhouse, you no longer need a garden shed. Gardening supplies, tools, accessories, and equipment can be stored in a greenhouse in addition to being used for gardening. These goods should be arranged in the area where you frequently utilize them.
You’ll save a lot on grocery shopping
The ability to cultivate your own fruits, veggies, herbs, and flowers in your greenhouse is a wonderful perk. Gardening in greenhouses allows you to grow your favorite fruits and vegetables all year round, as well as save money on groceries.
You’ll save money on food bills since you won’t be affected by fluctuations in the price of fresh produce caused by weather or shipping costs.
You’ll have more control of your produce
Besides saving money, greenhouse gardening is good for your health because you’ll be able to manage the conditions in which your plants develop. As an example, you can rest assured knowing that the food you eat is devoid of harmful chemicals and pesticides.
Learn How to Build a Small Walk-In Greenhouse!
The first step in becoming a greenhouse gardener is learning how to build a tiny walk-in greenhouse. Experience the thrill of having a lush, green oasis in your own backyard.
Why Should You Go for a DIY Greenhouse?
Why Bother Having a Greenhouse at All?
Any suburban or urban backyard would benefit from a greenhouse. Is it really worth the effort? How much of an impact can a greenhouse have?
All-Season Growing
Because of my greenhouse, I am able to grow earlier in the spring and later into the fall. Because of the greenhouse, spinach and Brussels sprouts are always available.
Okras, cherry tomatoes, and Asian eggplants can all be grown well in cooler climates.
In spite of the fact that my garden is located in a temperate area, I’m no stranger to sudden frosts, cold waves, and storms. Because of this, I decided to construct my greenhouse using materials that can endure even hail the size of a fist.
Pest Control
Pests are another issue to consider. My pest-control operations have become a hundred times easier thanks to the greenhouse.
A series of fruitless Colorado potato beetle-control operations preceded my greenhouse. My sadness was compounded when I realized that a new potato beetle had come into my garden.
You won’t find any in my greenhouse!
The tomato caterpillars are the same. They’ve been kept at bay thanks to the greenhouse.
Having a sunroof over the plants prevents the solutions from being washed away by rain because I don’t use pesticides.
Environmental Factor
In many regions of the world, the homegrown food movement has already begun to gain traction. As much food as possible will be grown locally, reducing transportation emissions and the usage of chemicals that keep produce fresh during transportation across the ocean.
Because of this, our supermarket bags don’t have to be filled with thousands of miles worth of produce from remote farms.
For the most part, I shop for food right there in my greenhouse.
Comfort
Gardening can be much more enjoyable if you can get in and out of a greenhouse that you can walk around in. Even if it’s pouring or frigid outdoors, I can still enjoy some quality “garden time” with my plants.
Why is DIY Better than Ready-Made?
Saves Money
These cheap greenhouses are built in China, and they’re comprised of weak plastic parts that won’t last through a single storm.
To save money while still getting a solid structure that will preserve your plants for many years, consider doing it yourself.
If you build one yourself or buy a ready-made greenhouse, you’ll pay far less than if someone else does it for you.
Is An Enjoyable Project
It was a lot of fun to build my own greenhouse. A lot of new abilities have been learned and old ones have been honed. Digging and raking soil is my favorite aspect of any construction project.
You Get to Choose the Materials
Using natural or repurposed materials can further lessen your environmental effect. Even if you use wood, metal, or even plastic in your greenhouse, the environmental footprint is smaller than that of a purchased greenhouse.
4 Crucial Things to Consider Before Building Your DIY Greenhouse
What Does It Cost?
It all comes down to whether or not you want to make a significant financial commitment or if you simply require a greenhouse that is affordable. The most cost-effective option is to do it yourself using supplies from a local hardware store.
Having a greenhouse built for you is the most expensive choice, while building one yourself with a greenhouse kit is the second-costliest.
The cost of a 14-by-10-foot greenhouse built by a contractor at $25 per square foot would be $3,500. There are, of course, a variety of proposals from different contractors.
This is now the maximum price.
Xem thêm : How To Transplant Sunflowers? A Few Tips to Remember
It’s going to be less expensive if you do it yourself.
When I was constructing my greenhouse, the concrete foundation was the most expensive item. Instead of doing the work myself, I had ready-to-pour concrete brought in.
In retrospect, I think pavers would have been a better choice. It would be less time consuming and less untidy, but it would cost more money.
PVC or fiberglass hoops are the cheapest option for the superstructure. For $43, I came upon this offer.
This translucent plastic greenhouse covering, which measures 12 by 25 feet, will set you back no more than $60.
As a rough guide, you may expect to pay anything from $100 to $3,500 for a DIY greenhouse.
Which Greenhouse Type to Choose?
My investigation led me to discover that there are three primary sorts of greenhouses. As a result, the first set of inquiries you should make are these:
- Is there enough room in my house?
- Which plants do I wish to nurture within?
You’ll know right away whether you’re in need of a:
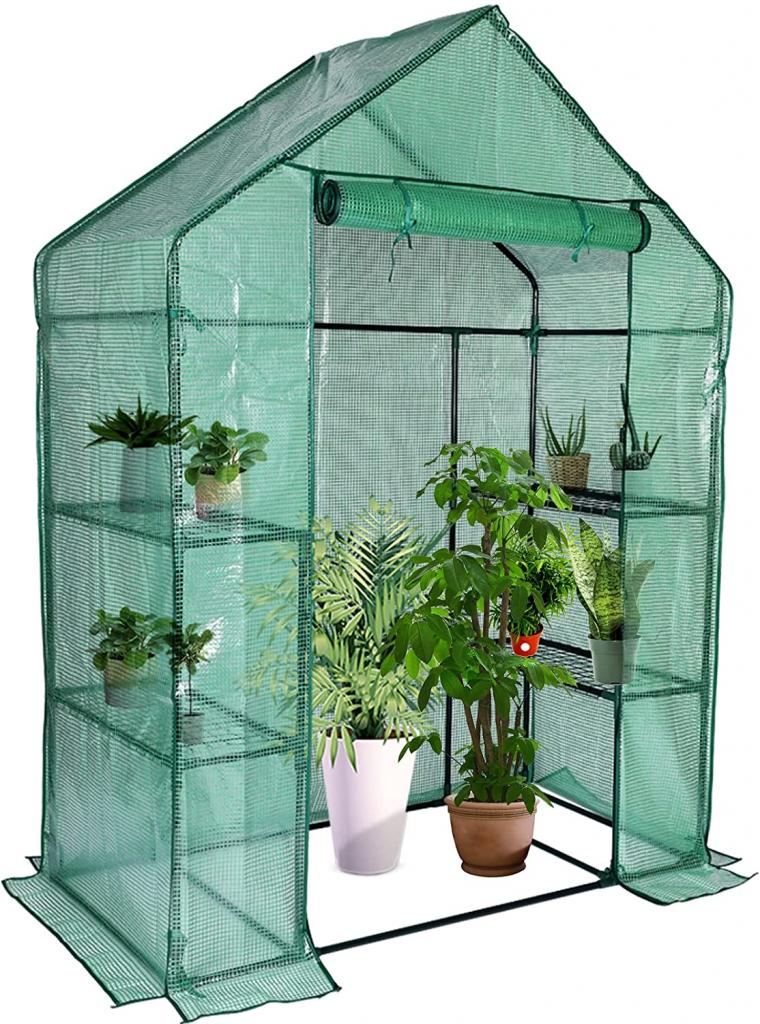
Mini-Greenhouse
This is the tiniest greenhouse you can construct at home. Moving them about your lawn or even within is simple, because to their portability.
Planters can be supported on the shelves of a vertical greenhouse if you have little floor space.
You should go horizontal if you need to cover a patch or raised beds.
You can only access the plants from the top of these greenhouses by removing a portion of the cover.
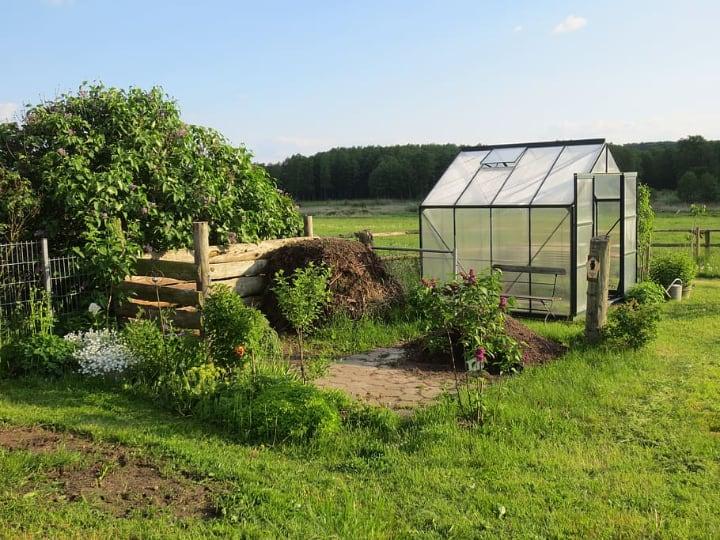
Walk-In Greenhouse
If you’re able to enter your greenhouse and stand upright, there are several advantages. Additionally, you can put some of your gardening supplies, such as seed packets, on the shelves.
A walk-in greenhouse can also be portable; instead of using the foundation, you can secure it with tent pegs.
If the construction of a permanent structure is too hard due to local building codes, this alternative may be appealing to you.
Using this method, you may simply put up the greenhouse and take it down whenever you want.
Large Greenhouse
Large greenhouses can be shaped like a tunnel, a home, or anything in between and beyond, allowing you to maximize your growing space.
Since we’re dealing with a more substantial superstructure, a concrete foundation and gravel flooring may be required.
As a bonus, you’ll have complete pest control while also preventing your greenhouse from sinking into the ground or tipping over.
Concrete is impenetrable to creepy crawlies of any kind.
DIY Greenhouse Styles
Hoops and Plastic
This is the most straightforward style to create. There is no need for a foundation with this design because it is so light. Even hardware wire mesh, which is great for plants like cucumbers, peas and gourds, can be used. Using a greenhouse of this type is ideal for covering existing garden beds.
Portable Window Frames
It’s a great way to reuse old windows and cedar boards in a creative way. With a glazed cover that opens like a roof window, you end up with a set of portable planters. With this DIY greenhouse style, your yard will seem spruced-up in no time at all.
Portable A-Frame Greenhouse
Using wood pallets and plastic greenhouse panels, you may construct yet another form of transportable garden greenhouse. Overlay it on top of or fill it with pots.
Decorative plastic sheeting is an affordable option for protecting the floors, but UV-grade greenhouse plastic will endure longer and won’t yellow with age like the more expensive option.
Lean-tos can be built on the sunny side of your house or shed instead, and they’re less expensive than the A-frame.
Full-size Greenhouse
I went with this sort of greenhouse. A huge greenhouse, I reasoned, can accomplish tasks that a tiny greenhouse cannot.
There are a number of options, including wood or aluminum framing and polycarbonate panels. You should check your code to see if this type qualifies as a utility building if it necessitates the use of a foundation.
What Does the Law Say?
Make sure to check with your local building department to find out if you’ll need a permit before you begin.
As a general rule of thumb, the stricter the laws get the closer you get to the city center. This, of course, does not apply to mini- and portable greenhouses.
It’s not necessary to get a permission for a greenhouse in most rural regions, as it is classified as a shed or accessory structure.
If you’re building in an urban area, you’ll have to pay for a permit, which adds to the expense.
In any event, this is something you don’t want to find out midway through the project. Make sure you cross all the t’s and dot all the i’s with your town’s building department.
It is also necessary to acquire the consent of your HOA if you live in a community with a homeowner’s association (HOA).
Due to the rigorous no-outbuildings laws in many housing developments, this part could get complicated quickly.
So to summarize, knowing your local rules will assist you in deciding which DIY greenhouse ideas you should pursue.
8 Steps to Build a DIY Greenhouse
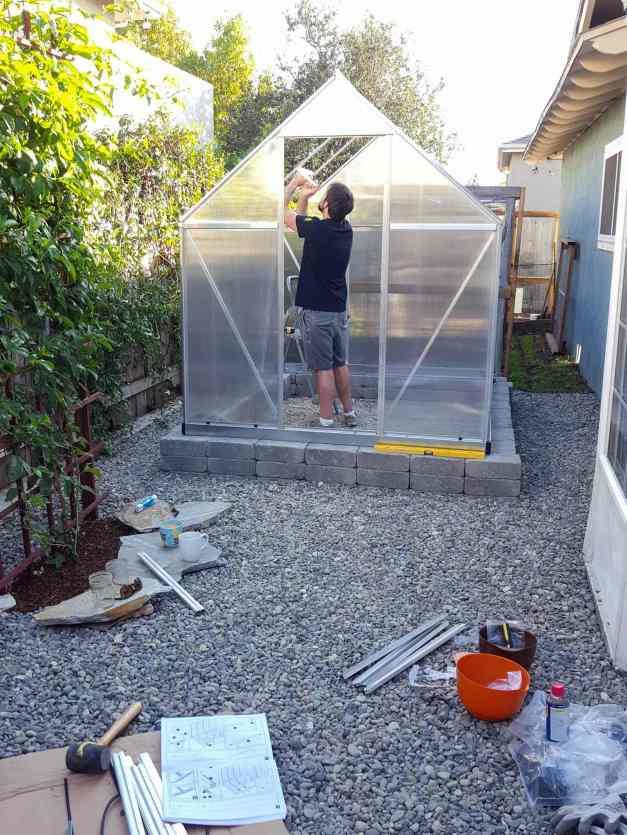
A concrete foundation, aluminum framing, and acrylic panels are all that’s needed to make a full-size DIY greenhouse. Whenever possible, I’ll also suggest alternate routes.
Step 1: Pick the Best Location
Because a greenhouse that doesn’t get enough sunlight is useless, this is the first and most important stage.
Get the Orientation Right
Make sure that all buildings and tall trees are located to the north of the greenhouse. Even if you reside in a place like New Zealand, you’ll find that the opposite is true.
A lean-to greenhouse is best placed on the south side of a building, if possible.
Morning vs. Afternoon Sun
Though an all-day sun position would be ideal, it is preferable to pick a time of day where the sun rises in the morning rather than the afternoon. Plants thrive in the early morning hours when they are exposed to the most sunshine.
A greenhouse should be built where there is at least six hours of direct sunlight each day.
Consider the Seasons
Xem thêm : How To Keep Small Bugs Out Of Your Greenhouse? Helpful Tips To Remember
In the winter, the sun rises and sets at a different angle than it does in the summer. From November through February, the sun will shine more brightly if you choose an east-facing site.
It’s also a difficulty in the afternoon because of low winter sun because of houses, trees, and fences
I don’t recommend placing a greenhouse near a tree, but if you must, choose a deciduous tree because the plants in the greenhouse want as much sunlight as possible during the winter months when the leaves are shedding.
A Well-Drained Place
You should avoid placing your greenhouse in a dip or at the bottom of an incline that collects rainfall if your backyard is uneven. You may need to create a dry creek bed or fill in the area to encourage drainage.
Step 2: Select the Foundation and Frame
For my greenhouse, I decided on a concrete foundation since I wanted it to withstand all kinds of weather. Instead of using poured concrete, you can utilize pavers for added stability.
I probably should have used pavers instead of poured concrete because of their superior drainage.
As an alternative to using a foundation, you can lay down flooring made of a variety of materials, such as crushed stone, wood decking, metal grates, or flagstone. It’s cheap, it drains effectively, and you can easily add additional gravel to a greenhouse layout if you run out. I don’t think it’s a good idea to leave the floor naked. When it rains, even if you have a well-designed drainage system, the ground will still get muddy and soggy.
I have the option of using aluminum or wood for the frame. As an alternative, wood is a less expensive and more convenient material for smaller greenhouses.
Aluminum’s light weight, strength, and corrosion resistance were all factors in my decision to use it. The greenhouse’s metal frame allows you to change the style and color of the structure to suit your needs.
Aluminum is a material that can be recycled over and over again, making it an environmentally friendly choice.
A self-tapping screw was utilized to fasten the aluminum.
Step 3: Choose the Suitable Covering
I couldn’t go back to UV-stabilized polyethylene because I’d already selected an aluminum frame. Tunnel-style PVC pipe greenhouses are an excellent match for this type of design. We’re going to make our own greenhouse panels out of:
- Earth-friendly glass doesn’t turn yellow and allows in the most natural light possible. For a greenhouse that stands out, you may want to consider using this material, which is also the most eye-catching. As any misalignment can lead it to break, you need a solidly-framed greenhouse with a foundation in order to employ glass. It’s true that glass is prone to breakage, and it’s expensive to replace.
- When compared to glass, fiberglass is a more cost-effective material. A cheap product, on the other hand, will become yellow and lose its transparency in a matter of years. Unless you’re on a tight budget, I can’t recommend a fiberglass coating.
- Polycarbonate, on the other hand, is UV-resistant and has a strong light transmission. Because of its double wall, it’s 200 times more resistant to breakage than glass, and it saves 30% more energy than regular windows. It does, however, include poisons that are water soluble, such as BPA. It’s not an issue when you’re building a greenhouse for your floral and cactus plants.
- Rigorously speaking, the ideal material for covering solid frames is acrylic or plexiglass. It isn’t as durable as polycarbonate, but it doesn’t have BPA in it. Even though it’s the most expensive non-glass choice, it offers the highest light transmission of all plastics at 90%.
Step 4: Flooring — Do I Need It?
You don’t want to use bare soil as a flooring, as previously stated. It doesn’t matter where your greenhouse is located if it’s located in a dry area.
Concrete slab
Choosing to lay a concrete slab as a foundation means that you’ll have high-quality flooring in place as well.
This material is the most long-lasting and easiest to keep clean. It can accommodate a wide variety of tables and shelving.
The initial outlay may be prohibitive, but I believe concrete is a sound investment in the long run.
Gravel floor
You should still build a timber frame foundation and fill it with crushed stone or gravel, regardless of whether or not you plan to use poured concrete. This is a low-cost and simple-to-clean solution.
However, if you want to use gravel as a flooring, you’ll need to make sure it drains well. Your own greenhouse can become infested with weeds due to water seeping in between the rocks.
Using a weed mat and rocks and gravel on top of it can help prevent this.
Materials NOT to Use for Flooring!
- Despite the fact that it’s beautiful and rustic, I don’t think wood is the best option for flooring. There is a good chance that mold and other pests may begin to grow in your greenhouse at some point. If you want to save money, you might choose pressure-treated wood or a naturally resistant wood like cedar.
- As a result, bricks should be put over sand for greater stability and drainage in the greenhouse.
- Think twice about using mulch in your greenhouse, even if it’s cheap and attractive on the outside. Mulch decomposes quickly, leaving behind bacteria and fungi that are impossible to remove.
Step 5: Let’s Put Everything Together
The easiest approach to ensure a stable and even floor is to remove a layer of grass and dirt, regardless of whether you’re utilizing a concrete slab or not.
You can either hire a professional or mix your own cement at home.
This is a critical step, so be sure you’re doing it correctly. Make your own concrete forms out of 2 x 4 boards if you’re doing it yourself.
The alternative is to use weed mat to cover the ground before driving the frame supports into it and then pouring gravel on top of it.
Drill holes in the panels and aluminum profiles. Once the frame has been built, it’s always best to assemble the smaller components before installing them.
You can use a wrench, a ratchet, or a low-torque, low-speed drill for this task.
During the process of building the greenhouse’s aluminum profiles, I recommend installing the greenhouse cover panels. When you have a lot of excess material, you can simply cut it off this manner.
Obviously, if you’re using a prefabricated greenhouse, this step is a lot easier to complete than if you’re building your own. The advantage of doing it yourself is that you may learn from your mistakes and improve your handyman skills as you go.
Step 6: Set the Ideal Temperature
During the summer, the greenhouse might get too hot, while in the winter, it can become too chilly.
- You can leave a few side windows or rooftop vents open, as well as use exhaust fans, if it becomes too hot. A diagonal flow can be created by placing the fans at the corners of the greenhouse. Shade cloths can also be used to reduce solar heat gain.
- Installing an electric heater with a thermostat and forced circulation helps keep your greenhouse warm if it becomes too cold. Using bubble wrap to insulate greenhouses is an environmentally friendly option. The inside of the glass should be coated with a few strips.
Alternatively, you can store water in a small, dark barrel inside your greenhouse. At daytime, it heats up and then releases the heat at night, ensuring that the temperature inside is a few degrees warmer than outside.
A cold greenhouse or a hothouse for tropical plants is the most significant consideration here. It’s not possible to grow both crops in the same greenhouse.
Step 7: Shelving Time
You’ll need some gardening tools now. By now, it should be obvious that we are constructing a greenhouse with no connection to the soil beneath it. You must now choose the type of planters you intend to utilize.
- For a gravel surface, raised beds are a suitable option because excess water may readily drain away. The height of raised beds allows you to easily tend to your plants.
- If you’re growing your plants in pots, a potting table is an excellent choice. You can evaluate every plant from any angle thanks to these seats, which save a lot of room. There’s also a lot of storage space under there for all of your stuff!
You must take into account shadows if you utilize shelving and want plants on the lower levels.
Step 8: Watering
The method you use to water your plants relies on the size of your greenhouse and the amount of room you have to work with.
With raised beds, a drip irrigation system can save you a lot of water while making watering a lot more convenient.
Nothing more complicated than turning on the water when you want it. Watering can be totally automated with the use of a timer.
When you’re away on vacation, you won’t have to ask your neighbors or friends to come over and water your children for you.
Final Thoughts
I can honestly say that the entire process of building my own greenhouse, from looking at greenhouse plans to putting it together, was a joy and a learning experience.
A little barn-raising event, or in this instance, a greenhouse-raising event, was organized with the help of several friends. LOL
Building a greenhouse on your own has a number of advantages.
Now that I’ve invested in my own garden, I’m not only saving money but also reducing my reliance on store-bought food.
Nguồn: https://iatsabbioneta.org
Danh mục: Garden


