Do you need a new air conditioner (AC) for your camper van or RV, or do you want to take the old one out of service? If that’s the case, then come along as we detail our steps for completing this activity.
- Where Can I Buy Air Conditioner Coil Cleaner? Choose The Right One
- How Often Should My Air Conditioner Cycle? Things You Should Know About
- How Many Decibels Is A Quiet Air Conditioner? All Questions Answered!
- Why Is My Air Conditioner So Loud? Common Reasons and How To Fix Them
- How Old Is My Air Conditioner
Many factors necessitate taking the AC unit out of a recreational vehicle or camper trailer. It’s possible that you need to replace the complete unit, perform maintenance, or simply remove it so that you may work on your roof.
Bạn đang xem: How To Remove RV Air Conditioner? Step by Step Instructions
If you need to do this, for whatever reason, it may seem daunting. Yet, things aren’t quite as dire as they appear. We just went through this ourselves, so we figured we’d give you the inside scoop.
Safety First
If you need help with anything electrical, don’t come to me for advice because I’m not an electrician and don’t have the credentials to give it. That’s all I’m doing here — laying out the methodology behind how I completed this task.
All electric currents are genuine, and it is your responsibility to protect yourself from harm. Do not do any of anything unless you are certain that all power has been turned off and that you are in a secure area.
If you are unsure how to proceed, it is best to seek advice or employ an expert.
How to remove an RV A/C
TURN OFF THE LIGHTS AND OTHER ELECTRICAL MATERIALS!
In reality, there aren’t all that many processes involved in taking out an air conditioner. Let’s get started on the inside of your equipment and work our way outside.
To get started, remove the air return grill. It should only be attached by a few clips or tabs. The next four screws out of a total of six will be clearly visible. Take the barbecue grill outside of the path.
To get to the last two screws, you’ll need to remove a cover that has two tabs that must be pushed out. Once those are out, you can go ahead and remove all 6 screws and the entire cover will come off.
Once those are out of the way, you can go to work dismantling the unit on top of your rig by removing the four lengthy bolts that hold it together internally. These can be located in each of the four corners of the metal mounting bracket.
It’s time to get out the ratchet and the right socket and take out these four screws. You can count on them to be rather lengthy. Prepare to give your forearms a little pump.
Take the metal housing off now that the bolts are loose. Mine was a close fit, so I carefully eased it out from each side. Only the wires connecting everything together remain at this point.
On my unit, I had to cut power to two different outlets. With one simple pull, one group of wires can be removed from the outside of the device. Remove the clamp now.
Once you unplug that cluster of cables, you’ll find two more wires hooked in under some sort of cover. You can get to the wire clip behind this panel, which is secured with a single screw. You may now peel back the tape and unplug the cables.
When you unplug the cable, there’s nothing holding the lower unit to the top. Leave it dangling from the cables that are still unplugged. Although this shouldn’t be a problem, it’s best to double-check that no wires are being pinched or otherwise compromised.
You’re dead within and it shows. Let’s finish this up on the roof, where it belongs.
The AC cover, which is mounted to the wall by screws on both sides, may be quickly and easily removed. Carefully remove the cover off the base of the unit after removing all the screws.
In addition to the screws, the tight (frictional) fit usually does the trick of keeping it in place. Put it on the ground once you’ve turned it off. You wouldn’t want a strong wind to toss it off the roof, where it could be damaged.
As you make your way around the AC unit, carefully lift or pry up the edges to remove them. If the gasket is trapped and needs to be broken free, this will help.
Feelings of everything loosening up should serve as a warning that you’re getting close. Set it aside or take it off the roof after you’re sure it’s entirely loose.
These units are quite large and heavy, therefore it will probably need 2 persons to lift it from the top. Take your time and avoid any mishaps during this process, and then put it away somewhere dry.
How to install an RV A/C
Now that you’ve completed the project, it’s time to reinstall the air conditioning.
The gasket on the base of the unit should be replaced. It’s possible that it was damaged (even slightly) during the removal process.
Buying a replacement is a low-cost option that will bring significant mental relief. I purchased a universal gasket from Amazon, and it seems to have done the trick.
Center the unit over the AC opening once you’ve made sure the new gasket is fastened to the bottom. You can make the final modifications inside the camper, so don’t worry too much about getting it exactly right.
Turn around and go back inside to finish up.
After entering, you can see if the unit is centered over the access point. From the inside, you can make any necessary adjustments to the centering and spacing.
Let’s plug in the two wire harnesses that we unplugged before we took it apart. The clip within the unit needs to have its metal cover reattached. Each of the other wires exits the housing and joins up with others elsewhere. With a single booming sound, the wires are once again where they belong.
It’s time to give those forearms another nice pump. Get the four long bolts back that you took out. It’s time to reassemble the top and bottom halves. Squeeze the bottom back into its snug original position and check for proper alignment.
Get out the ratchet and socket once more and start the other four bolts. Make sure no wires are being pinched or are in a vulnerable position, then check the whole thing over again. If everything seems secure, you can begin tightening the bolts one by one as you move clockwise around the room.
The gasket will compress as it gets more snug. Make sure it fits snugly but not too tightly to ensure a watertight seal.
To reassemble, first replace the grille insert, then the faceplate. After it is finished, you will be ready to travel. It’s not a terrible idea to double-check that everything is working properly.
Return to the roof and secure the AC cover. Align the screw holes and center it over the unit before screwing it in. When everything is in the right place, you can screw it together.
Congrats… Successful completion is now yours. Go ahead and have fun.
Step 1. Removing covers and hardware
The air conditioner is the simplest part to take off, and it can be done by just taking out a few screws. The RV’s plastic inside cover is the first thing to get rid of. This can be done by loosening a few screws and/or turning a few dials. Once the top is off, the AC’s inside should be easily accessible. The AC plug is located here.
Make sure the air conditioner’s circuit breaker is off before removing the wire harness to prevent electrical shock or a fire hazard.
Turning off the electricity allows you to safely remove the wire harness. The outer ornamental plastic cover on the roof is the second component to take off. After taking off the protective plastic, you should be able to gain access to the system’s condenser and evaporator.
The next step is to attach the primary hardware for the air conditioner to the roof. There are often four large bolts and nuts holding it in place; remove them. The unit can be taken out if the screws and covers are removed.
Pry free the caulk and/or butyl tape that was used to form a watertight seal on the air conditioner with a Wonder Bar or putty knife.
Step 2. Removing the main unit from the roof
Remove the AC unit from the roof, then drop it to the ground. The main unit is big and large, so you’ll want to have a buddy or companion help you get it down from the roof.
Take precautions so that you and your travel companion don’t get wounded or the RV roof is dented. Taking the A/C system out of the camper van is the final step. If you are installing a new air conditioner in place of the old one, you may just reverse these instructions. To ensure that your new air conditioner is installed correctly and without leaks, please read the following section on roof preparation.
Step 3. Roof preparation
Preparation is the key to success in every endeavor, and this is no different. A water leak will occur if it is not done correctly. It is crucial to clean the roof thoroughly before installing the air conditioner, patch, or any other roofing material to ensure a solid bond.
My experience has been that a mild dish soap solution, a brush, and some good old-fashioned elbow grease are all that’s needed to clean a roof. Now that the roof has been cleaned and dried, the following step is to install the new roofing material or repair the existing roof. A watertight seal requires the complete absence of any and all dirt, debris, grease, or filth.
Step 4. Cutting the metal roof patch
Aluminum is the material of choice for this step due to its strength and light weight, but steel could also be used.
It is recommended to measure the opening in the roof and add two inches to that number to provide for a decent overlap while caulking the roof. Two separate cuts will be required: one for the roof and one for the interior of the RV.
The metal was cut using a fine saw blade on a jigsaw, and the rough edges were smoothed off with a file. A grinder can be used to smooth the edges.
Make sure you have sturdy structure to drive the screws into before you attempt to install the metal roof patch. Replacement framing can be added at this stage if necessary. Angle brackets made of wood or metal will do the trick. With sturdy structure in place, it’s time to put on the roof patch.

Step 5. Installing the metal roof patch
Now that your roof is free of debris, has dried, and the metal for the fix has been cut, you may put it in place. Caulk, butyl tape, and sheet metal roof screws were the tools of choice. In addition to its function as a sealer, the butyl tape also served as a fastener, and this bond will be further strengthened when the roof is heated up throughout the summer. After shooting the screws into the roof, I caulked all of the exposed edges and screw heads with Vulkem 116 to make sure there was a watertight seal.
After the roof patch is in place, go to the interior and install the metal patch. Add some insulation and fasten everything together using screws.
After the caulk has fully dried, you should use a good roof sealer to complete the repair to your roof. This not only adds to the overall aesthetic, but also serves as an additional layer of protection against water.
Whether you want to save money by changing your RV’s air conditioner yourself, make more room for storage or a killer solar setup, or any combination of the three, I hope these techniques are helpful. Continue on your way.
Love RVing? You’ll Love RV LIFE Pro
That itch to see the world and experience life on the road. It’s the trip, not the final goal, that matters. Traveling is a means of learning about the globe. You can forego buying a house since everywhere you go, that is your home. Yes, sir, that describes RV life perfectly.
However, it can be difficult to organize an epic road trip with an RV. This is why we at RV LIFE think it should be kept easy. We’ve been in your shoes and have assisted millions of other RV travelers in achieving their travel goals with the knowledge and confidence that comes from being RV owners ourselves.
Xem thêm : Where Is The Drain Hole On A Window Air Conditioner
Our RV GPS app transforms your smartphone into a GPS system designed specifically for use with recreational vehicles, and our RV Trip Wizard assists you in organizing a trip to remember. Visit one of our fantastic RV forum communities if you need answers to any RV-related questions.
The first thing you need do is visit the website (link provided) to get all the details and to start your free trial.
Next, map out the route of your ideal RV vacation.
Why Should I Remove My RV AC?
It’s possible that, like us, you don’t turn on the air conditioning in your RV very often, if at all, when boondocking.
After a year of full-timing, we rarely used the RV air conditioner, if at all, and only when we were in an RV park for the night on our way through a city to a boondocking site.
If you’re a normal dry camper and not connected up to 30 or 50 amp electricity or have a sizable generator, an RV air conditioner may seem like a luxury you’ll never need.
There will be less wind resistance on top of your RV or trailer if you take out the air conditioner. The weight of an air conditioner for a recreational vehicle can add up to a noticeable amount.
Our RV is a few years old, so there isn’t a vent or skylight in the main living area.
Our 2013 Heartland Prowler is an example of this. The bedroom is well-lit with multiple windows and a skylight, but the main living/working space has no such access.
Every one of the windows has been tinted, so there isn’t a lot of natural light coming in. When we spent our first southern winter in a travel trailer, we were struck by how dim it was inside.
To improve the trailer’s lighting, we decided to install a skylight, vent, or fan.
After installing a 12V fan with a white vent lid (click to view on Amazon) in lieu of our RV’s air conditioner, I can attest to the fact that it much improves the available light.
Here I’ll detail the process of disconnecting the RV’s air conditioner and wiring in a 12V fan. With this knowledge in hand, installing a skylight (viewable on Amazon by clicking here) or a Maxxair Fan is a breeze (click to view on Amazon).
We are not experts, therefore any repairs you make to your RV are done so at your own risk.
How To Remove An RV Air Conditioner Unit
A portable air conditioner for a recreational vehicle can be removed with minimal effort and equipment. Finding a secure method to lower the RV air conditioner from the roof is the greatest challenge.
Careful handling is required while transferring an air conditioner, which can weigh up to 100 pounds, especially if you intend to store it for later use or resell it. Later on, I’ll go into more detail about how to remove the air conditioner from your RV’s roof.
Step 1: Turn Off All Power
Because RV air conditioners use both 120V and 12V power, isolating the RV from both the 120V and 12V sources is a good idea.
While this may seem excessive, remember that you will be handling live electricity and that extra precautions should always be taken while dealing with it.
Second, take off the interior cover.
When you first go into your RV, the first thing you’ll want to do is remove is the plastic covering the interior. Removing the inside cover of either a ducted or non-ducted RV air conditioner unit requires only loosening four screws located in the unit’s corners.
Additionally, the cover’s inside can have a few more screws. The cover typically has a small plastic door that may be removed to gain access to these.
A few of screws are used to secure the cover on the inside. When the cover is taken off, it should be taken off in its entirety.
Make Sure The Wiring Is Safe For Use Thirdly,
An electrical box is used to connect the air conditioner to the motorhome’s power supply.
If you’re lucky, the entire box will come apart from the RV AC, and you may take it outside without taking off the main AC cover.
You should exercise caution about a few issues.
Your RV thermostat may control both the air conditioner and the heater.
Disconnecting specific wires rendered the heater inoperable, as we discovered to our cost. However, your camper’s electrical setup may be different.
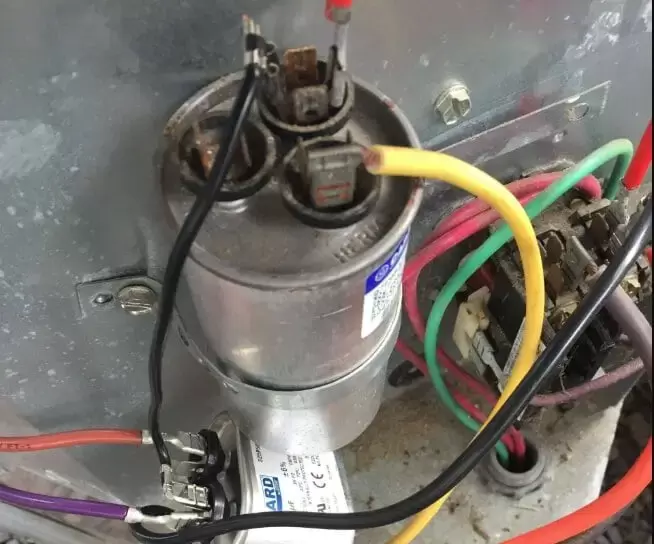
The large yellow cable in the picture above connects to the black box on the far left. Remove them from the junction box and secure the exposed wires with screws and tape.
There is no need to keep any of the little wires or the big white plug that are pictured above. If you plan on reinstalling your RV air conditioner at a later date, make sure to clearly label the wiring.
You may simply tape over these cables and tuck them out of the way if you are building a standard vent or a skylight.
A 12V fan, such as a Maxxair, requires some additional fiddling with these wires during the installation process. Leave them tucked to the side for the time being.
Taking Apart The Mounting Bolts
After disconnecting the power cord, you may take the remaining four bolts out from under the RV and remove the air conditioner.
There are black bolts in each corner of the metal frame. It’s the inside threads you’ll need to undo.
When these lengthy bolts are taken out, the metal frame will collapse, and the RV air conditioner can be taken out.
5. Turn Off Recreational Vehicle Air Conditioning
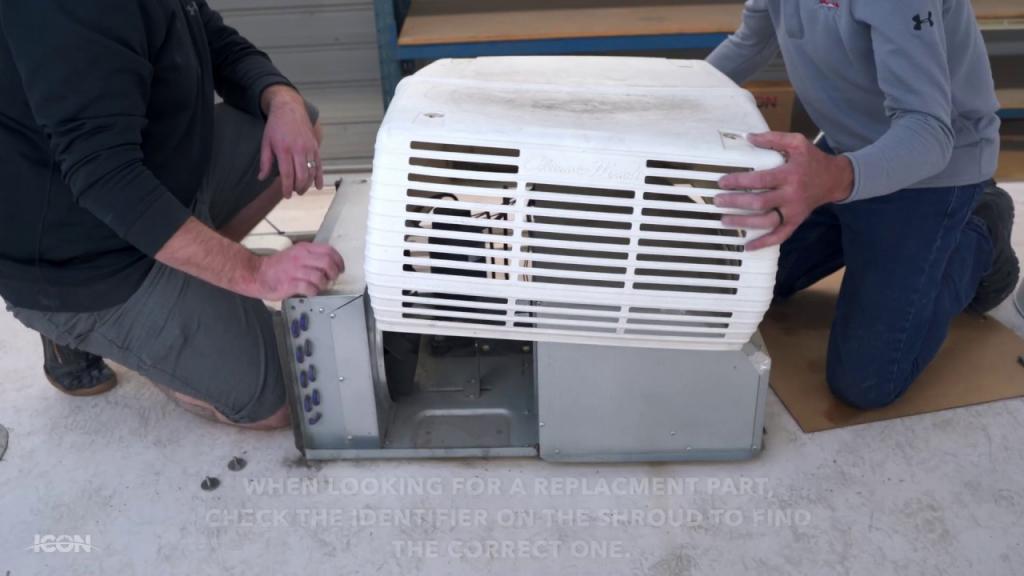
When removing the RV air conditioner, you can either push on it from the inside or lift it off the roof. This ought to peel off easily.
If the wire is properly unplugged, and there is no caulk or sealant, you can just peel it off.
The object in the image’s center is removable foam.
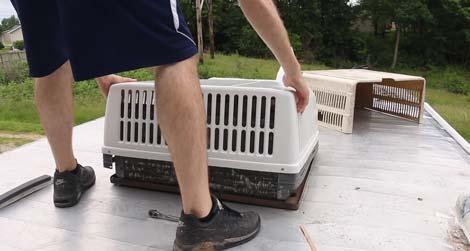
Move The Air Conditioner From The RV’s Roof To The Ground
As I mentioned before, the most challenging aspect of RV AC removal is lowering the unit to the ground without damaging it.
I’ve seen a few different approaches to this. Ours was taken down with the help of a skid steer loader. We moved the RV air conditioner onto the bucket, which I had set up next to the trailer roof.
Finally, I set it gently on the floor.
In the absence of a skid-steer, you may need to improvise.
A rope pulley system can be used to lower an RV from an open-beam roof. I’ve also heard of folks using 2x4s to build a ramp for the air conditioner to roll down.
Whatever method you use, be cautious and avoid standing directly in front of the RV’s air conditioner.
How To Measure For An RV Vent, 12V Fan, Or Skylight
When I bought my RV, I assumed the AC unit would require a larger hole in the roof than the typical 14×14 inch hole used for vents and fans.
It also means that you won’t have to do any cutting to install most standard-sized vents, skylights, or fans. Most RV roof accessories will fit a hole of around 14 inches by 14 inches, but you should measure just to be sure.
One thing you could have difficulties locating is a “garnish ring” of the right size to accommodate the roof thickness of your motorhome, trailer, fifth-wheel, or van.
A plastic ring known as a garnish ring can be used to cover up unsightly vents, fans, and even skylights when installed indoors. It hides the exposed wood on the ceiling and gives the room a more polished feel.
Our travel trailer’s RV air conditioning unit was installed in the middle of the roof, thus the interior ceiling was higher than usual.
Because of the thickness of our roof, we needed a larger than usual garnish ring—6 inches—for our RV’s vents, fans, and skylights, which typically measure 2 1/2 inches.
Internal roof measurements are the most reliable and accurate.
You may get an accurate roof thickness measurement before disassembling your RV air conditioner by removing the interior cover.
Xem thêm : 3 Factors That Causes Freezing Of Air Conditioners. How To Unfreeze Air Conditioner?
When placing an order for a component that requires a garnish ring, a longer ring is acceptable but a shorter ring is not.
The Maxxair fan includes a long garnish ring that must be trimmed to fit the contours of your roof.
The Ultimate Resource for RV Leveling Blocks
Because of financial constraints, we had to forego purchasing a Maxxair fan.
Instead, we opted for a low-priced 12V fan/RV vent (click to view on Amazon) and a 6″ garnish ring (similar) (click to view on Amazon).
It was the right size and has served us well for several months.
It is need to acquire a garnish ring like this one separately if you plan to add a skylight (viewable here on Amazon) (click to view on Amazon).
You won’t need to buy a separate garnish ring unless your RV has a very thick roof if you replace your AC with a Fan-Tastic fan like this one (click to view on Amazon).
How To Install An RV Vent, 12V Fan, Or Skylight
You are almost ready to install the RV air conditioner now that you know what RV vent, 12V fan, or skylight you will need to cover the hole.
Other Products You Will Need
There are a few extra things you’ll need for a successful install in addition to the RV vent, 12V fan, or skylight and the appropriate size of garnish ring. Among these are:
- Sealant for Auto-Leveling Joints (click to view on Amazon)
- Using Butyl Putty Tape (click to view on Amazon)
1. Put Vent, 12V, Or Skylight Over The Hole
To begin, remove any external debris, such as dirt or putty, from the hole’s surroundings. If there is any putty, you should remove it so that you can work on a smooth, even surface.
Our RV air conditioning unit’s access hole was only surrounded by soil. Just a rag and some soapy water did the trick for me.
Whatever you plan to use to plug the hole in your RV’s air conditioning can now be set in place.
To avoid having to fix it later, I wrapped the 12V fans’ inner edges with putty tape (click to view on Amazon).
All screw holes should be covered with putty tape, and the tape’s edges should overlap at the corners so that there are no exposed screw heads.
You should not leave any cracks or crevices in the putty tape while attempting to waterproof the roof of your RV. Lap sealant will be used to seal the perimeter, however that will be done later.
2. Take Care Of The Wires
You won’t have to deal with any of the electrical components if you’re installing a standard vent without a fan or a skylight without a fan, like these examples from Amazon (click to view on Amazon).
You can easily hide the exposed wires from your RV air conditioner by wrapping them in electrical tape and using electrical nuts (click to view on Amazon).
It’s important that no exposed cables be visible, so please move any that are to the side.
However, things get trickier if you want to install a Fan-Tastic fan (click to view on Amazon) or a standard RV 12V fan (click to view on Amazon) like we did.
The 120V electricity is unnecessary; rather, you should hook up the fan to the 12V so it may be used even when you’re not near a power outlet.
You should seek out expert assistance if you are unfamiliar with this process, as we are not trained electricians.
The circuit was completed by joining the positive fan wire (which we identified as blue and white) to the power source.
A female blade connector was used to initially link these wires to the black box. To attach the positive fan wire, we had to sever the female connector.
The orange and red wires will be joined together to form the negative fan connection. The electrical nut could be easily removed, and the negative fan wire attached, because these weren’t linked to the main black electrical box.
After you’ve finished hooking everything up, reconnect the RV’s batteries and see whether the fan will turn on.
No adjustments to the thermostat should be necessary. Also, turn on the heat via the thermostat to see if it is still functioning.
If it doesn’t turn on, something is probably wired incorrectly. Remember to turn off the power before tinkering with the cables again.
All the extra wires can be taped to the edges of the roof opening to keep them out of the way.
In our recreational vehicle, the air conditioning system was ducted, so much of the wiring was concealed within the ducts.
There should be enough room for the remaining AC wires thanks to the extra space provided by the garnish ring.
3. Secure The Vent To The Roof
You can now begin screwing the vent, fan, or skylight to the roof of your RV once you have connected the wires or set them to the side.
When attaching a vent, make sure the hinges face the front of the RV or trailer. Consider that if the vent were open while you were driving, you would prefer that the wind blow it closed.
Also, make sure it’s centered so the garnish ring fits. The process involves having one person hold the vent in place from the ceiling of the RV while another person pushes the garnish ring into place from inside the vehicle.
The grille ring can be installed in the slit between the bug screen and the grille of a vent or fan.
The garnish ring for a skylight installation need only reach the eaves.
If the garnish ring is going to fit and the vent is centered, you can start screwing it on from the roof. The holes in the corners must be drilled before moving on to the ones in the center.
After you have fastened everything in place, the grey putty tape may begin to protrude.
The putty tape seems to be doing its job of sealing the vent to the roof. It is not a huge concern if you leave the bulging putty tape in place after applying the self-leveling lap sealant, but some people choose to trim off the excess.
4. Secure The Garnish Ring
The garnish ring can be installed from the interior of the house once the vent, fan, or skylight has been fixed to the roof.
When setting up a Fan-Tastic fan, be sure to use the ring provided as a garnish.
Garnish rings for 12V fans, vents, and skylights can usually be installed at the same time as the rest of the fixture.
The ring can be trimmed to size if necessary.
The garnish ring is fastened in place with four screws around the mouthpiece. The RV air conditioner’s painted screws are suitable for reuse.
5. Cover Outside With Lap Sealant
The sealant is the most crucial aspect of any RV roof installation.
Using insufficient self-leveling lap sealant and no putty tape are the two most common causes of leaks in RV roofs (click to view on Amazon).
You can see how much lap sealant I’ve used in the picture above; it’s approximately 2 inches thick, which is enough to cover all the screws, most of the metal vent edge, and about a half an inch of the roof.
About 15 minutes after I finished spreading the lap sealant, I snapped this photo to document its progress.
It took two tubes of lap sealant, but I finally had the vent covered up the way I intended it to be. For my part, there’s never a bad time to have more of this stuff around.
Since we put in our 12V fan vent, we’ve had a few rainy days with no leaks.
6. Enjoy Your New Vent, Fan, Or Skylight
Having finished the installation, you should now see a significant increase in the amount of natural light entering your RV.
Instead of an air conditioner, we’ve found that a simple 12V fan/vent works great in our travel trailer, plus it doesn’t eat up nearly as much power.
Since we don’t plan on using our RV again anytime soon, we took the opportunity to store its air conditioning unit.
Do you need help figuring out if a vent, fan, or skylight is right for your RV’s air conditioner? Do you have something to say?
Conclusion
Hopefully, you feel more confident about attempting this project on your own now that some of the mystery has been removed. It’s not hard at all, and any do-it-yourselfer should be able to pull it off.
The essential idea remains the same even if you choose a different set-up. Now that you have a better grasp of the big picture, you may move forward with the project without fear of making mistakes.
Nguồn: https://iatsabbioneta.org
Danh mục: Conditioner