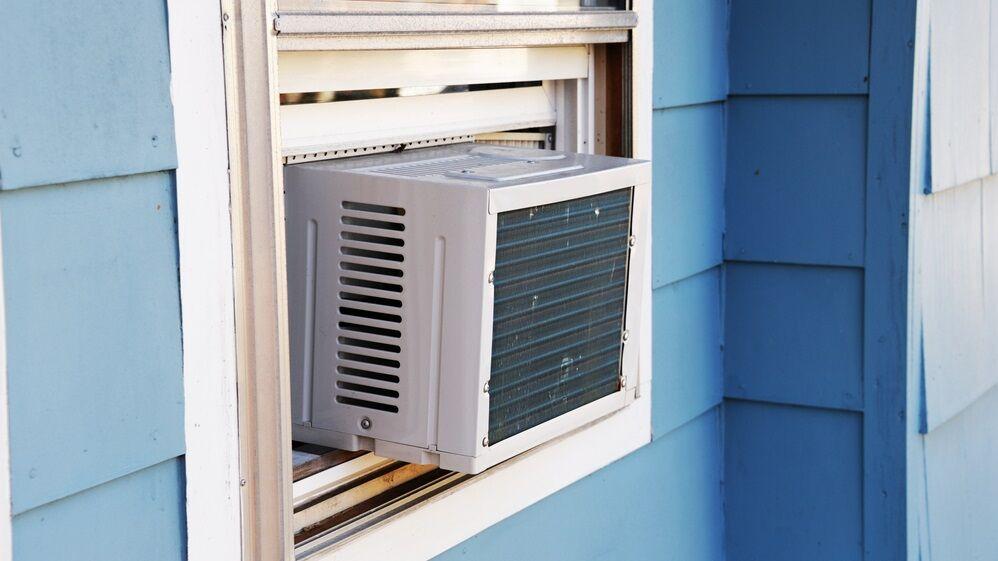
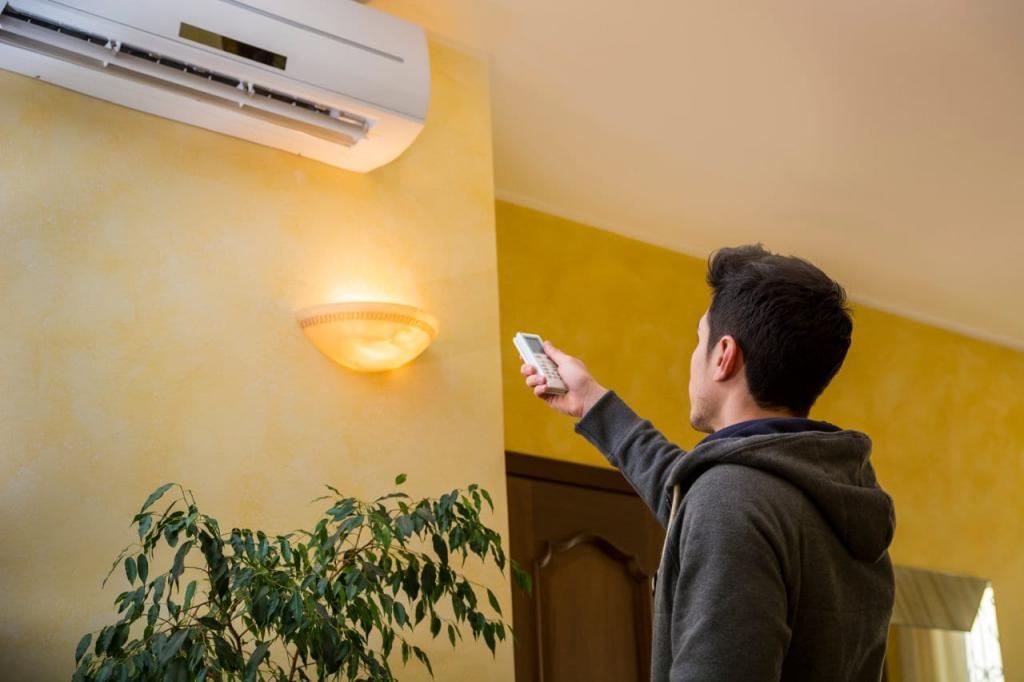
What is the best way to clean a mini-split AC? A mini-split air conditioner can be cleaned in four simple steps. These steps are detailed below. In recent years, the popularity of mini-split air conditioners has grown.
- How To Build An Air Conditioner Support Bracket? Step-by-Step Tutorial
- How To Drain Haier Portable Air Conditioner? Easy Step-by-step Guide
- What Does A Capacitor Do In An Air Conditioner? Helpful Information!
- How To Clean A Window Air Conditioner Without Removing It? Best Guide
- How To Clear A Clogged Air Conditioner Drain Line? Complete Step-by-Step Guide
For starters, mini-split air conditioners don’t necessitate a ventilation duct, which can be a costly setup task for homes that don’t already have one installed. In spite of this, most homeowners prefer mini-split air conditioning systems since they are more efficient over time and are less expensive to maintain.
Bạn đang xem: How To Clean A Mini Split Air Conditioner? Easy Step-by-step Guide
As a result, the owner would encounter minimal problems in the future. It would help if you cleaned Mini-split AC regularly. It’s possible that dust and other small particles will build up inside of it.
Steps To Clean A Mini Split Air Conditioner
As a result, the owner would encounter minimal problems in the future. It would help if you cleaned Mini-split AC regularly. It’s possible that dust and other small particles will build up inside of it.
Step #1. Prepare your materials
That means there would be less issues for the owner in the future. It might assist if you cleaned Mini-split AC regularly. The dust and particles in it may accumulate and form an assembly.

Thus, the owner would face less troubles in the future. Mini-split AC would benefit from regular cleaning. It’s possible that dust and other particulates will build up inside of it and become a nuisance to breathe.
- Cleaning with a vacuum
- This is a little brush.
- Detergent
- A spray bottle
- Fin combs for air conditioners
- Antimicrobial cleaning spray
- a disinfectant with antimicrobial properties
- Mask
- Flashlight
Step #2. Turn off your air conditioning unit
Next, you’ll want to turn off your mini-split air conditioner to prevent it from overheating. Make sure that your air conditioner unit is not connected to any electrical source for your own safety.
The electricity can also be switched off to segregate a certain unit. Then, for your own protection, carefully remove it from the socket.
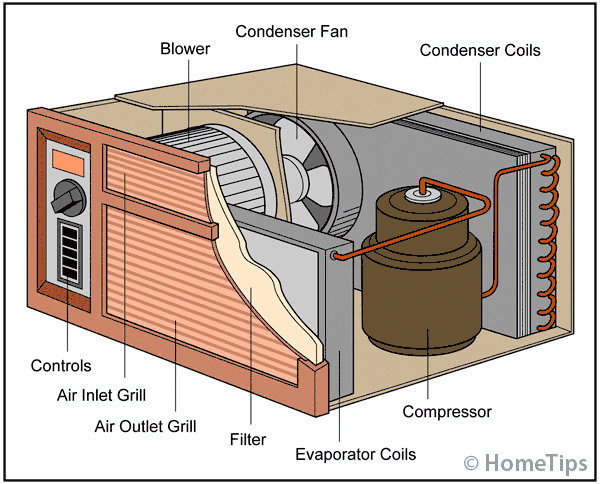
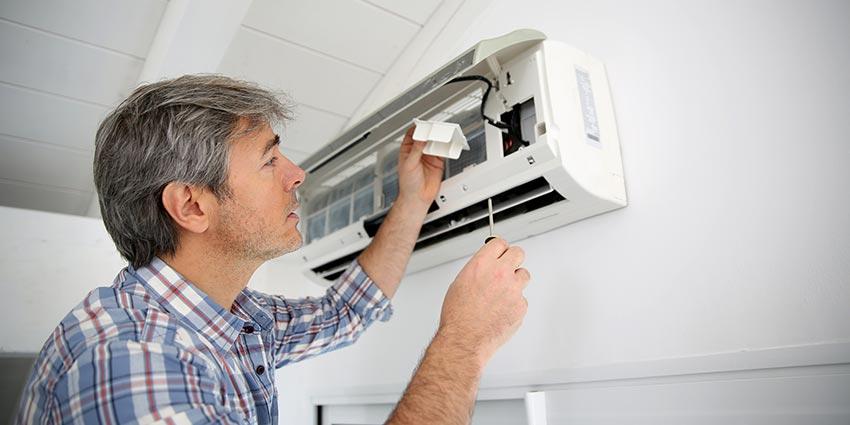
Step #3. Clean the exterior of your air conditioner
Find out what’s going on around the appliance’s exterior part. It is best to clear the area around your air conditioner of all plants, twigs and any other trash.
Make sure to use a moist towel to wipe out the outside of any outdoor furniture. Please use dishwashing liquid or another disinfectant to get rid of any lingering dirt or grime that is difficult to remove.
Clean the exterior of your air conditioner with a hose while still focusing on the side panels or motor cage. The best way to find the blades is to open the air conditioner.
To protect the blades, use a moist towel to wipe them down. Allow to dry on a level surface. Clean the curved blades using an AC fin comb. The fin comb’s soft fibers make for easy cleaning of the fins.
After that, use a vacuum cleaner to remove any remaining debris and clean the rest of the unit’s inside. Finally, reassemble this part of your computer to its original state.
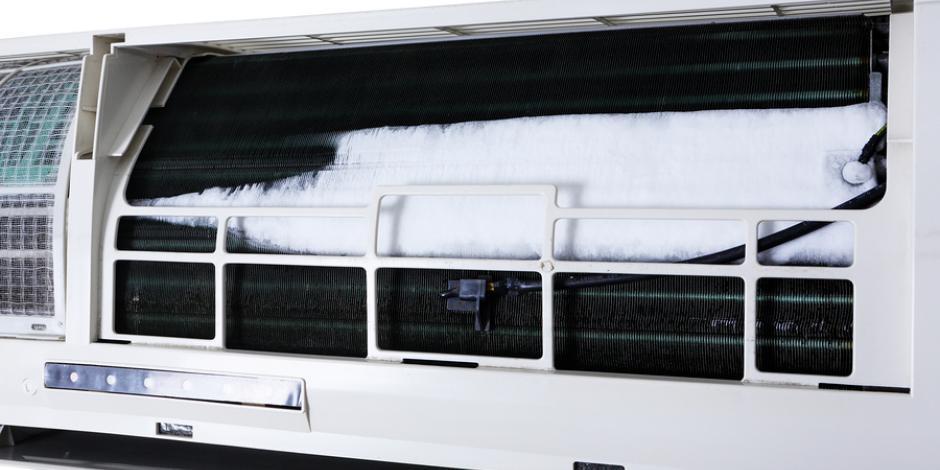
Step #4. Clean the interior section of your air conditioner
If your air conditioner has a damp towel, you can begin by wiping off the interior of the unit with it. Remove the front cover to reveal two air purifiers hidden inside.
Using caution, disconnect the air filters, and then wash them with soap and water. You may either keep your screens air dry or rinse them thoroughly with a clean and dry towel.
Use a vacuum cleaner to remove the dust and debris from the air fins. To avoid damaging your air conditioner, avoid letting your vacuum brush up against the fins.
Proceed to the evaporator coils after polishing the air fins. You can use a mild soap and water solution at home to clean your evaporator coils if they get a lot of grime. Sprinkle the solution onto your evaporator coils in a plastic jar half-full.
Once the sediment has been dislodged, immerse it for a few seconds to remove it. Cleaning the coils without the need to rinse them is also an option.
After that, use a clean microfiber or cloth to remove the dirt from the coils. Finally, sprinkle antifungal cleaner into the air conditioner’s interior to prevent hazardous fungus from forming.
Remove the hose that links your air conditioner’s inside and outside components. The water pipe can be emptied with its help.
Then, using the pressure hose, remove any residual soap and water from the sink. If your air conditioner’s tube becomes clogged throughout this process, it will be cleared.
Allow the hose to dry naturally for about one hour before connecting it. Instead of using a pressurized hose, mix bleach and water with soap in a bucket.
Pour the fluid down the drain after that. It is possible to perform the procedure two or three times. Put everything back together once you’re done. Then, turn on your air conditioner to see if it’s operating properly.
Clean the Mini Split System How Often?
Cleaning the blower wheel is a good idea, too, because it tends to collect dirt and grime.
The amount of time it takes for a unit to become dirty depends on the environment it is in.
Xem thêm : 3 Factors That Causes Freezing Of Air Conditioners. How To Unfreeze Air Conditioner?
For example, a desert area with lots of dust in the air will become dirty much quicker compared to mountainous regions.
Because of the amount of dust in the air in the desert, the land will become unclean considerably faster than a hilly environment.
How Difficult Is It to Maintain a Mini Split System?
To clean the evaporator, remove the front cover.
Cleaning the blower motor is also a good idea.
When removing the front cover and blower motor, each device will be somewhat different.
Naturally, if you’re unsure, you should contact a professional cleaner who can often clean a storage unit in 1-2 hours.
In most cases, it will cost between $100 and $200 to have an HVAC specialist come out and clean your unit.
What You’ll Need to Maintain a Mini Split
- A Drop Cloth.
- a small, split-open bag for cleaning
- Cleaner for the Evaporator Coil
- Screwdrivers and pliers are among the most commonly used tools.
- In a five-gallon container
Cleaner, a cleaning cover bag, and a few basic equipment are required to clean a micro split.
What you buy will have an impact on how thoroughly you clean the unit.
A variety of cleaners are available, from inexpensive single cans to large bottles that can clean multiple units.
Many HVAC technicians use Desolv 82565 for cleaning small splits because it’s convenient and easy to reorder.
A tiny, low-cost container is preferable if you only need to clean a single device.
To save money, a 5-gallon bucket with a 5-inch drain hole can be used to collect the waste from a tiny split cover bag that covers the entire unit.
A complete cleaning kit for a micro split can also be purchased if necessary.
Evaporator and blower wheel cleaning is the most important part of maintaining a micro split.
The disassembly of each device will be unique due to the fact that screws and other small pieces will be placed in various positions.
Even though each unit may be slightly different, the fundamentals will be the same.
How to Clean a Mini Split Air Conditioning and Heating System
- Mini-split should be turned off by closing the circuit breaker.
- Put down a plastic drop cloth to catch any water that could fall on the floor.
- Air filters should be removed.
- Remove the vent fins on the horizontal axis.
- The evaporator coil may be seen through the front cover.
- Remove the drain pan and hang it on the side.
- The blower wheel should be removed before cleaning it.
- Put the bag cover on the device.
- To clean the fins of the evaporator, spray some cleaner on the interior of it.
- The blower wheel should be cleaned and reinstalled into the unit.
- After reinstalling the drain pan and front lid, test the unit.
The Importance of Cleaning Your Mini-Split
A frequent cleaning of your mini-split is essential for a number of reasons. Keeping your mini-split clean is critical to ensuring that it continues to perform at its best quality, as previously mentioned. Internal components can wear down early, mold can form, and unusual smells can appear if a mini-split system is not cleaned for a long time. Furthermore, if your mini-split system is contaminated with dirt, dust, or mold, this might have a negative impact on your indoor air quality.
Leaving the mini-split system uncleaned for an extended period of time will also reduce its efficiency. The system may have to work harder as dirt, dust, and other impurities collect. Your monthly utility expenses are likely to rise as a result.
How To Clean Your Mini-Split HVAC System
Interior and outdoor units are the two main parts of a mini-split HVAC system. If you want to avoid the bad consequences we outlined above, you should clean both units on an ongoing basis. To get the most out of your mini-split, you should clean it around once every four to six weeks on average. If you’re unsure about how regularly to clean your system, review the owner’s manual that came with your computer.
Shut off the system and unplug it from the power source before cleaning either device. By doing this, you can protect yourself from electrocution while cleaning the electrical components of the system. To be on the safe side, remove the power cord from the wall outlet or main electrical panel fully before moving any electrical equipment.
Next, you’ll need to acquire the appropriate equipment for cleaning your mini-interior split’s or exterior unit after disconnecting the system’s power supply. However, you don’t need a lot of pricey or complex tools to clean your mini-split correctly. There are usually only a few things you’ll need:
- A wet, clean cloth
- A dry, clean cloth
- Cleaning supplies for the home (go to your owner’s handbook for a list of recommended cleaning supplies)
- A hose for delivering water
- Vacuum cleaners that come with a brush attachment
You’ll need the following for a more thorough clean:
- A device for cleaning coils
- A brush for scrubbing
- In a spray bottle
- Treatment of the drain pump for condensate
- Drain cleaner for condensate
Xem thêm : What Does A Capacitor Do In An Air Conditioner 2
Prepare your exterior and interior units for cleaning by gathering all the necessary supplies.
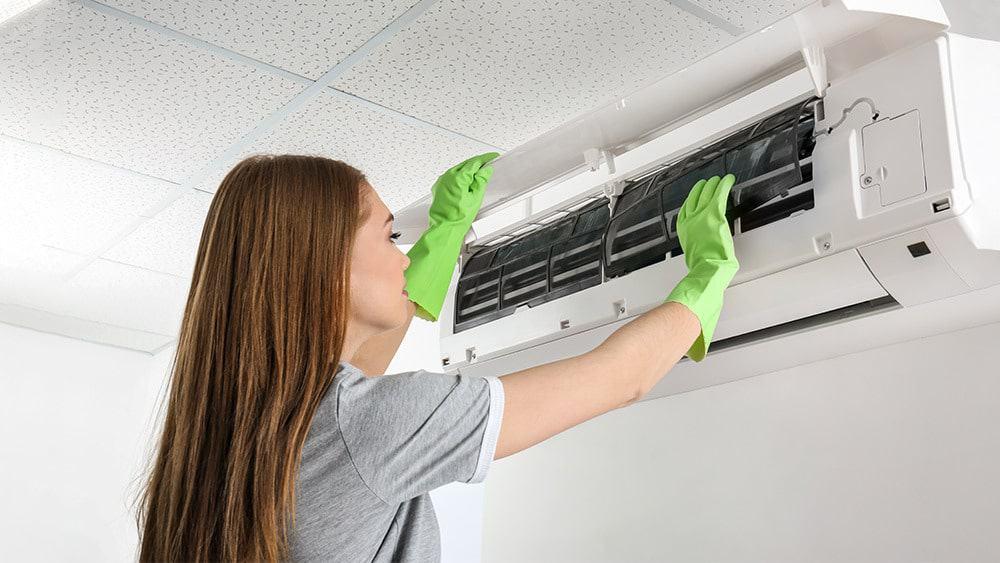
Cleaning the Indoor Unit of Your Mini-Split
Using a moist towel, wipe out the exterior of the indoor unit of your mini-split before drying it completely. Once you’ve found and removed the mini-split filter, wash it with water and a mild detergent. The front panel of the system must be removed in order to perform this action. Place the filter back into the system where you found it after cleaning and allowing it to air dry completely.
It’s time to move on to the evaporator coil after you’ve cleaned the filter. Remove the unit’s cabinet to gain access to the coil. Remove any dirt, mold, or other debris from the coils with a dry, clean cloth or a cloth that has been treated with coil cleaning. When you’ve finished cleaning the coils, reinstall the cabinet and front panel.
Finally, make sure to thoroughly clean the condensate pan and the drain. If you discover mold or other hard-to-remove debris in the drain pan, consider using soapy water or bleach to clean the pan and drain.
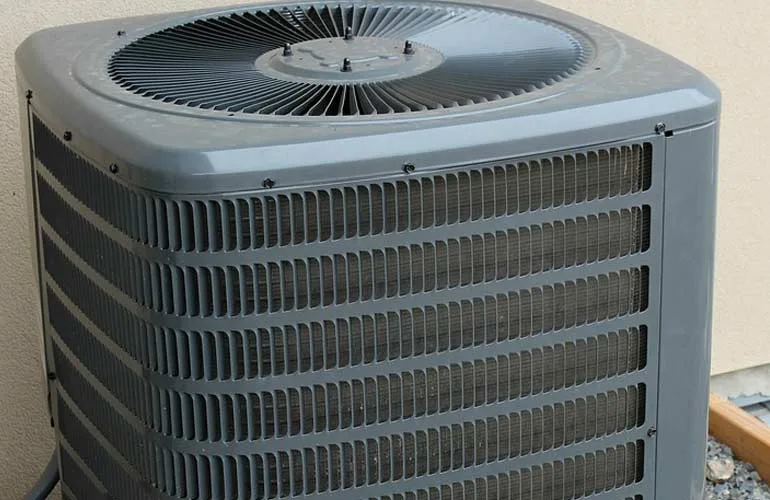
Cleaning the Outdoor Unit of Your Mini-Split
You can begin by removing any dirt from the outdoor unit of your mini-split system, such as twigs and leaves, and then move on to cleaning the unit itself. After that, clean the unit’s outside with a garden hose or coil cleaning tool. Remove any debris or filth from the unit’s housing with a cloth afterward. It is important to dry the housing thoroughly after washing it.
Next, spray and scrub the grille and fan cage of the outdoor unit with a hose and a towel or cleaning brush. If you can, remove the grille to clean the fan blades with a moist cloth and soap. Avoid bending or otherwise harming the metal blades, as they are delicate. Rinse and dry the blades well after cleaning them to avoid corrosion.
Clean the unit’s inside using a dry cloth and a vacuum attachment to remove any dust or other debris that may have accumulated. Use a hose and a coil cleaner to clean the external unit’s coils.
Check the condensate pan just like you did the indoor unit once the interior is clean. Consider using a bleach solution and then rinsing the pan with water if you observe any mold development. The last step is to clean out the drain hose with soap and water to ensure water can flow freely.
There are a broad variety of mini-split system options available at the Pioneer Mini Split Store, from simple wall-mounted splits to multi-zone floor-mounted systems. All of our systems come with everything you need to get started, and installation couldn’t be easier. Shop our wide selection of high-quality mini-split systems today to benefit from their energy efficiency and elegant appearance.
Why Is Maintaining Your Mini Split Unit Important?
Even though we’ve just emphasized how important it is to perform routine mini split maintenance checks, why should you care?
Preventing difficulties such as mold growth, bad odors, and worn-out interior parts can be accomplished in large part by routine cleaning. These problems are more likely to occur if the unit is neglected for a lengthy period of time.
Mini split cleaning is also important because it saves money. At its top performance, the system does not have to work as hard as before. Your monthly utility expenditures will be lower if your air conditioning or heating system is more efficient.
How to Clean a Mini Split Air Conditioner
Many people wonder about the frequency of mini-split maintenance. In other words, how often should you clean your mini-split system? What type of mini split unit you have and how frequently you utilize it will have a role in the response.
Before and after using your air conditioning system, be sure to thoroughly clean it (at the beginning and end of the hotter seasons wherever you live). When it comes to heating and air conditioning systems, you should clean them before and after every season.
The cooling fins and the coils are the portions of the system that require the most attention.
Products For Mini Split Cleaning
When it comes to cleaning and repairing your device, having the right equipment can make all the difference. The following are some of our favorites:
1. SpeedClean CJ-125 CoilJet Coil Cleaner System
There is no better coil cleaner system on the market today than the SpeedClean system. When you use this system, a forceful water spray from a portable pack cleans your evaporator coils and condensers. This technique is effective. To avoid overloading the condensate lines, unlike a power washer, this system is pressured to ensure maximum performance and versatility.
Water and cleaners/chemicals are stored separately in the cleaner system’s tank. Using this product, you can be sure that your micro split is running as smoothly as possible by making sure the coils are completely clean. To clean and restore the coils, the Mini-Split Accessory Kit can be used.
2. SpeedClean MSB-KIT Mini Split Bib Kit
With the help of SpeedClean’s tiny split bib kit, you can clean up the mess without leaving a trace. This tiny split coil and fan cleaning kit is an excellent choice. In order to keep your system clean and free of debris, this product allows you to attach a plastic bib (up to 44″ wide) to your system. Kits for wall-mounted units up to 60 inches wide are available, as well as a ceiling cassette kit for devices that are difficult to access.
When it comes to cleaning a mini-split, having everything you need to get started in the box and each bib lasting 10-12 uses is a cost-effective solution.
3. At Home Products
There’s no need to panic if you don’t have the right tools on hand to properly clean your mini split. Smaller vacuum attachments and cleaning goods for the home can be a fantastic place to start. Consult your system’s handbook for more information on how and what to clean it with.
Additional Mini Split Cleaning Tips
Keep an eye out for some of the more typical fixes that you may need to undertake in addition to the normal cleaning of your unit.
1. Replacement Pieces
Your system may require parts replacement from time to time if worn out components are found. The air filters and the coils are two of the most often replaced components since they are so vital to the machine’s operation.
2. Tightening Pieces
Certain screws or other smaller components may fall loose over time in the system. Keep an eye out for anything that could need to be tightened while you’re cleaning your system and inspect each bolt or screw.
3. What If You Come Across Issues During Your Maintenance?
While maintaining your mini-split unit, you may encounter other complications. Some problems can be solved by basic troubleshooting, whereas others might require the help of a professional.
Nguồn: https://iatsabbioneta.org
Danh mục: Conditioner